Table of Contents
Scene Set-up
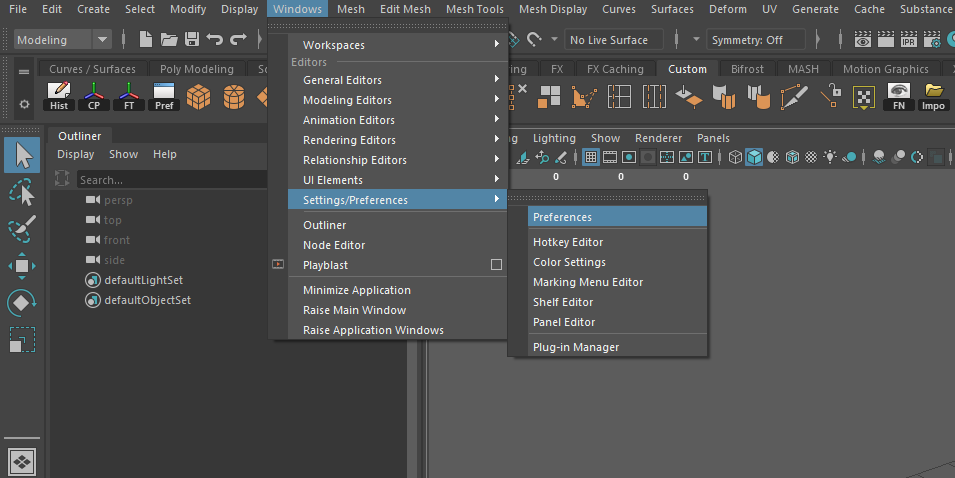
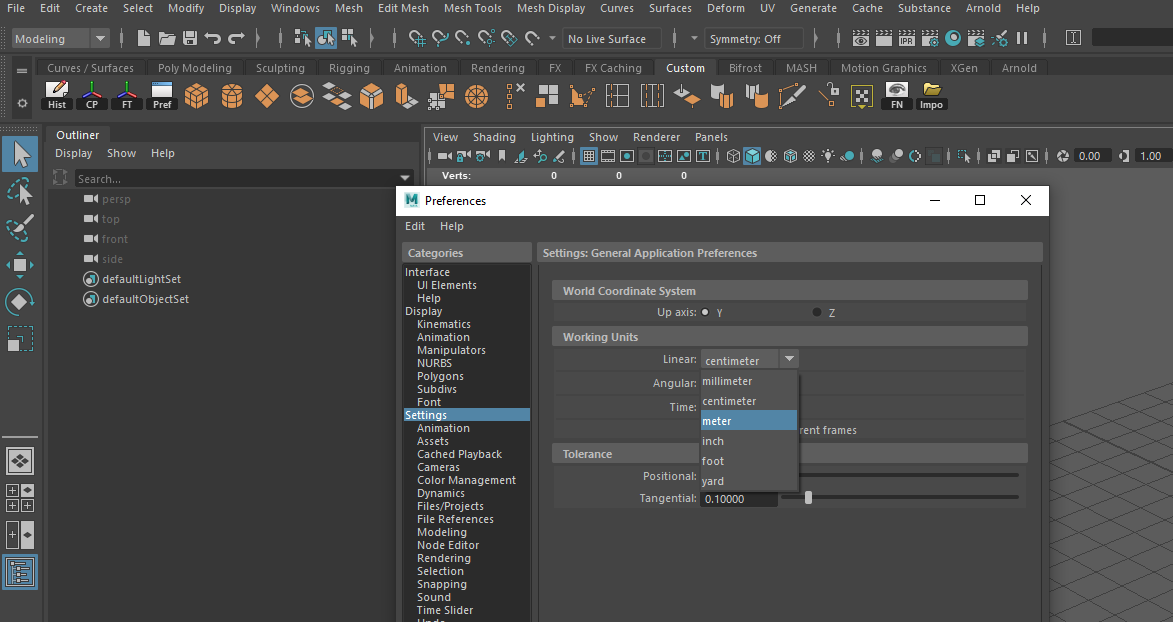
Start by setting up your scene by changing your scene units to meters. To do this go to windows → Settings/Preferences. Within the window that pops up go to Settings → Working units → Meter.
Importing your 3D model
Next Import your model by selecting File → Import → Select your file.
Its important to check if your model is clean. Please run trough the 3D model checklist here: Preparing your 3D models
Creating a Hierarchy
When the model is properly created or imported, it is time to create a hierarchy that Expivi can read. For information on hierarchy functionality check: Hierarchy .
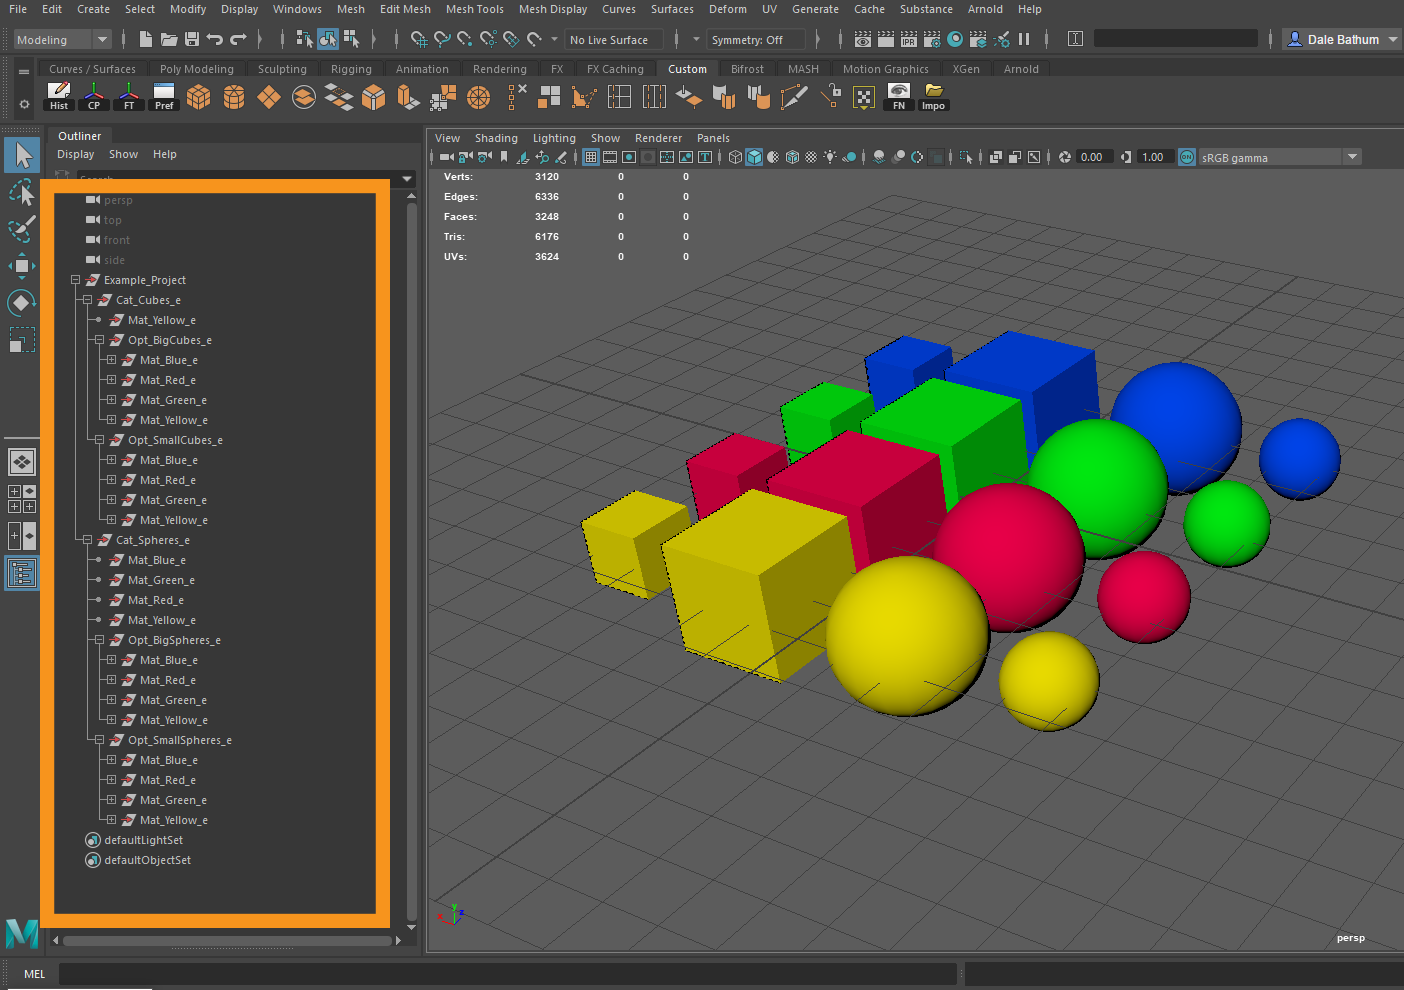
In order for Expivi to read your hierarchy you need to create groups. You can do this by selecting parts of your model and pressing Ctrl+G. You can rename them by double clicking the name in the outliner. Expivi will read the group names and place them in the correct order in the backend.
Setting up basic materials (optional)
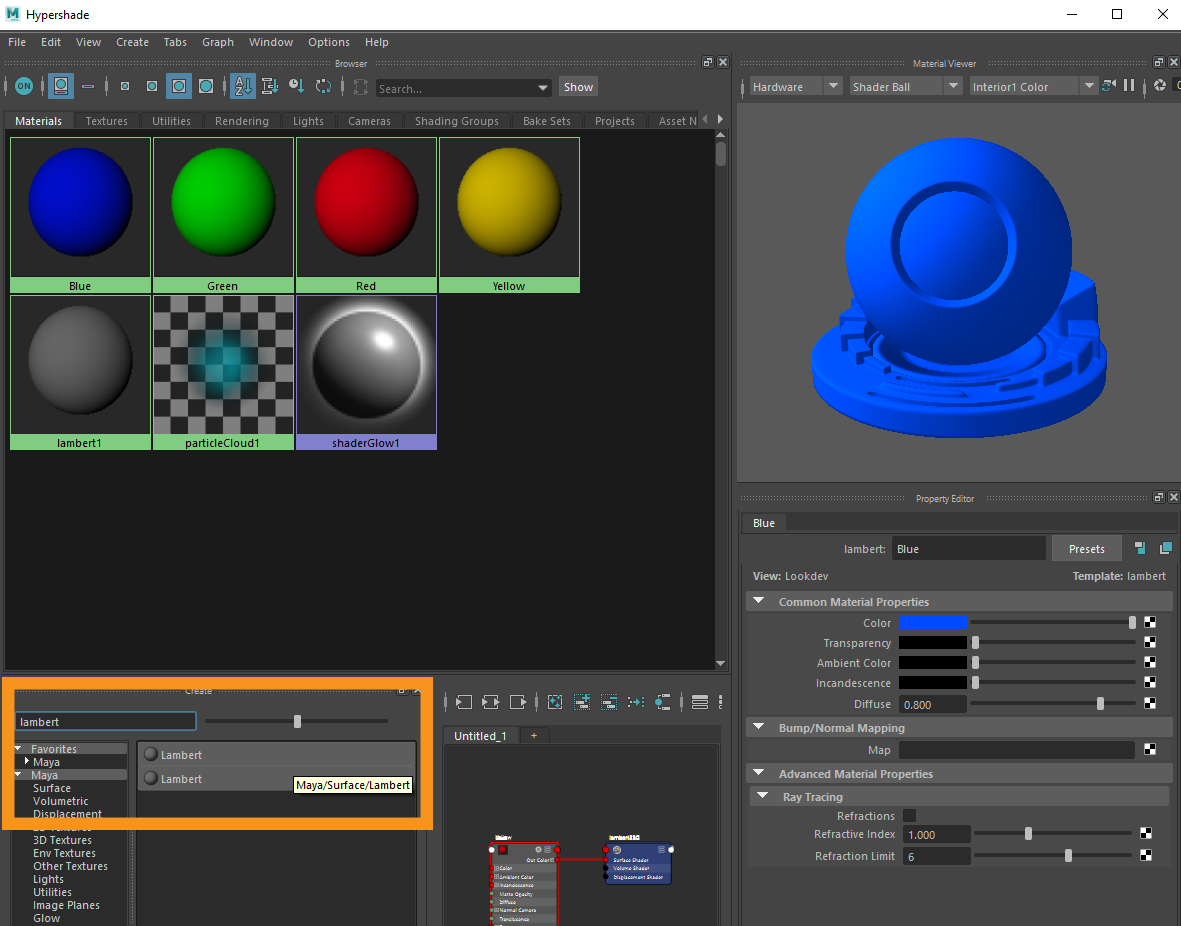
Expivi will recognize materials assigned within Maya. In the example below you can see 4 materials that have been defined; Blue, Green, Red and Yellow. This step is not essential when using MatGroups because a new material can be created and assigned within Expivi itself. However, if a part of your model is always the same color and does not need to change, you can consider simply giving it a material in Maya without putting the model in a MatGroup. When exporting and importing a file this way, Expivi will copy the material from Maya and assign it to the correct surface automatically.
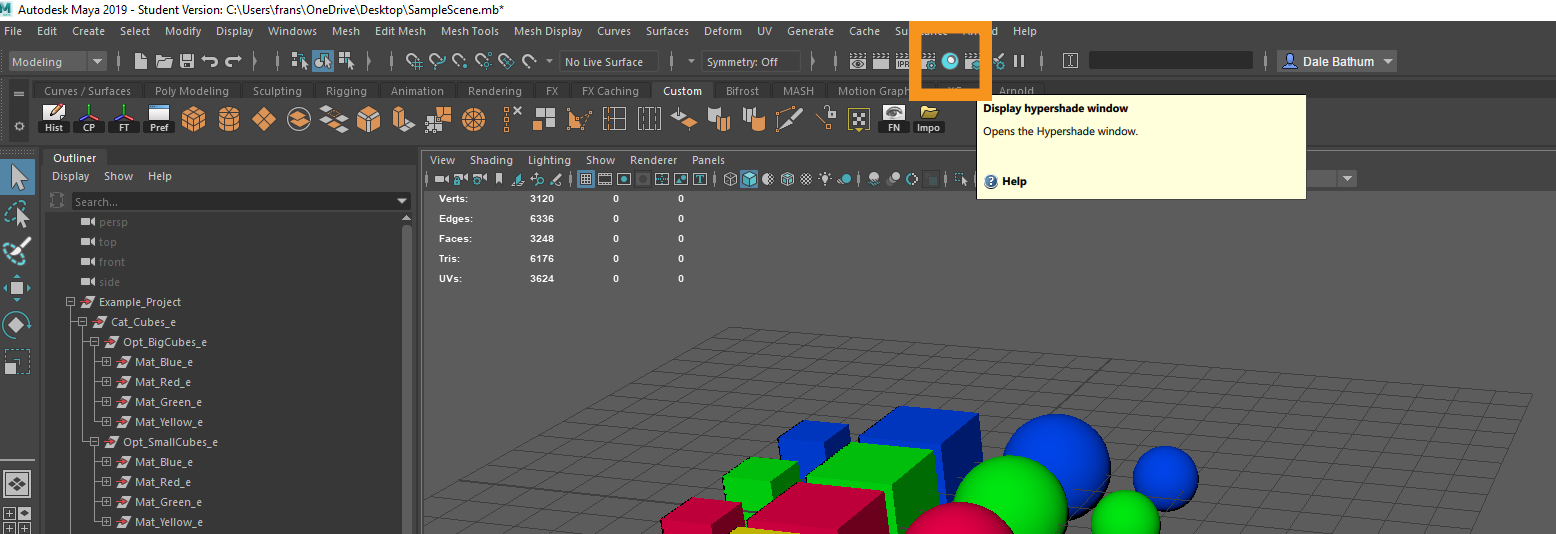
To create a basic material within maya press the ‘’Hypershade’’ button on the top shelf. This opens the hypershade editor. Within the editor search for ‘’Lambert’’. Which is the most commonly used material type within Maya. Press the lambert button to create a new material.
(Note: Other material types such as Phong will work as well but add no further functionality compared to Lambert)
To assign your new material to your object, first select the object you wish to assign the material to. Then hover over the material you wish to assign and hold the right mouse button. A radial menu pops up, select ‘’Assign Material to Selection’’ to assign the material to your mesh. You can also select parts of your mesh to assign the material too, such as individual faces.

You can also Drag and Drop the material on your mesh by hovering over the material, holding middle mouse button and dragging the selection to your model.
Exporting your model
When you are finished with setting up your hierarchy, it is time to export your model for use in Expivi. There are 2 option to export you model.
- Export a part of your model. To do this select the part of your model you wish to export in the outliner. With that selected, go to file → Export Selection. Now choose the extension you wish to use. (This can be FBX, DAE or OBJ. We recommend FBX) and press export selection.
- Export your entire scene. To do this simply go to file → Export all. Now choose the extension you wish to use and press export all.
The file is now ready to be imported in Expivi.
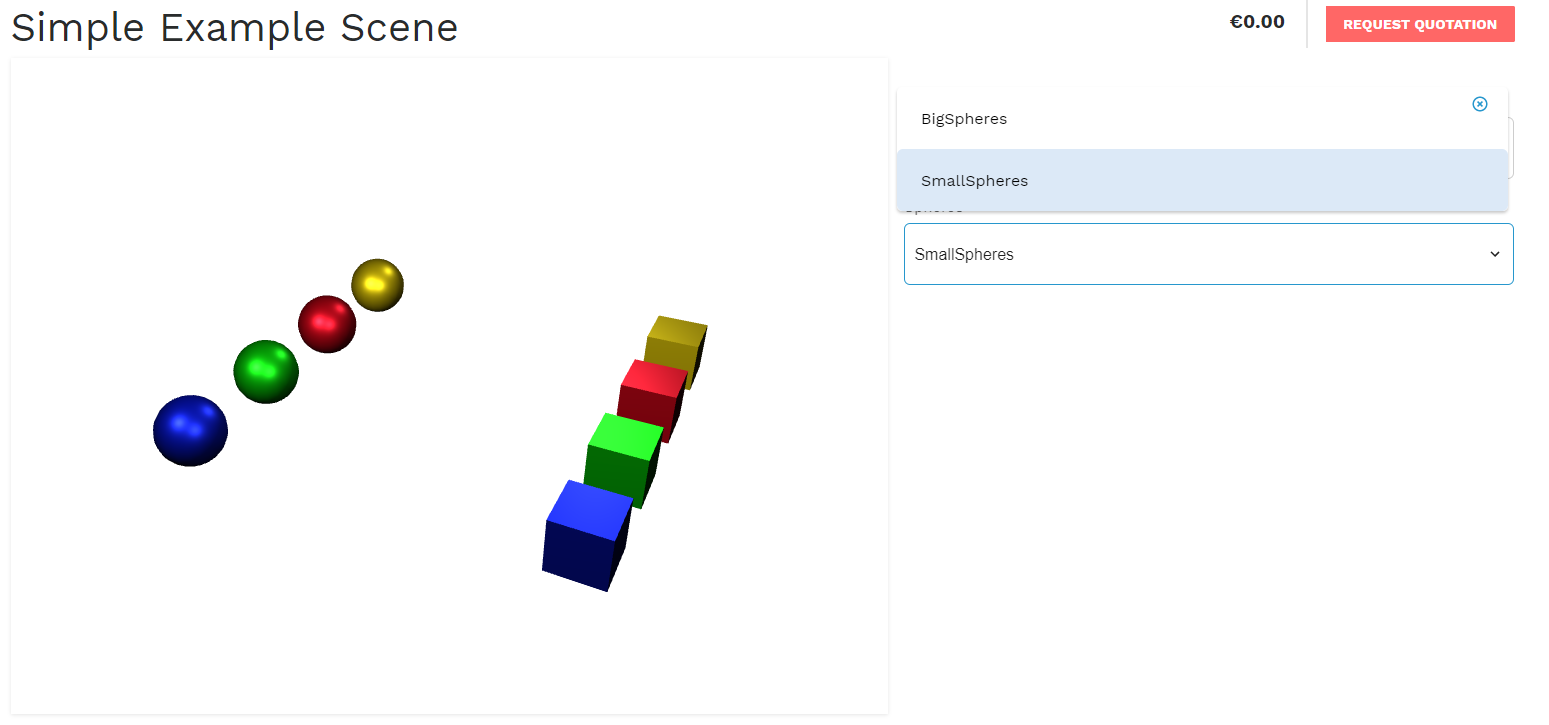
Example
If you followed the steps above, you are ready to import your model into Expivi. Check Getting started within Expivi on how to do this. Taking the example file used above, Expivi will recognize the options defined in the hierarchy and make them visible as you can see below.