This page will provide you with more information on the basics of using rules within the Expivi platorm.
As well as the basic concept of rules and its functionalities it also contains guidelines in order to make your work more readable/transferable.
Table of Contents
Table of Content
• What are rules?
• The Principles of Rules
• Basic Rule-Nodes
• Guidelines
What are Rules?
Also referred to as business rules, the Expivi rule system allows you to manipulate attributes, material groups and showcase entities by checking certain conditions within a product configurator.
As displayed on the sample images below, working with rules is a visual programming tool within the back-end. By connecting specific rule-nodes you will be able to manipulate a product configurator.

The concept of rules is to generate a signal based on an action. This signal can for example be generated by changing an option, a material or clicking through the configuration steps. After the signal has been generated, it will pass through all connected paths, once it arrives at the next rule node it will check the node’s condition or perform its actions.
The Principles of Rules
- Types of rules-nodes
- Input & output of rule-nodes
- Check & Active
- Rule-node Conditions
Types of rules-nodes
There are four types of different rule nodes:
- Broadcasts
- Checks
- Actions
- Utilities

Broadcasts
Broadcasts are the starting point of every rule-set. This node generates a signal when an event has taken place in the configurator. By selecting the appropriate broadcast-node you will be able to control a rule-set only if a particular event has taken place. Let’s say you only want to send out a signal if the webpage is loaded or refreshed, you will be able to do so using the Scene Initialization Broadcast-node. Broadcasts can trigger off of the events created by their own ruleset. It is common for a ruleset to be executed multiple times until all actions have been resolved. Selecting an option that is already active does not actually change the state of that question and will not trigger the broadcast again.
Checks
Check nodes are used to check the condition of an attribute, material group or showcase entity, using these rule-nodes you will be able to specify which signals will proceed through which outputs.
Actions
Using Action-nodes you will be able to define an action to be performed within the product configuration. This can range from selecting options, changing materials colors, adjusting camera positions and much more.
Utilities
As this documentation is ment to only cover the basics of rules I will only be highlighting the Time-Out rule-node, this node makes it possible to set a time-out in order to hold on to a signal for a defined amount of time. This means that you will be able to create a delay between broadcasts, checks and actions.
Input & output of rule-nodes
As shown in the image below, rule nodes always have input and output points. Broadcast nodes only have outputs, checks have both inputs and outputs and actions only have inputs.
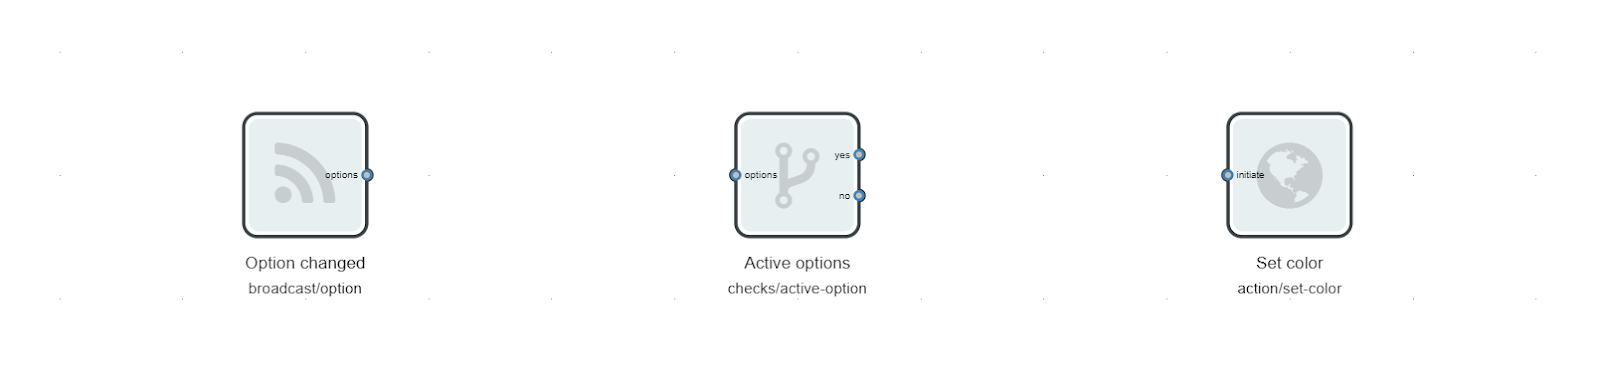
When connecting an output to an input it allows a signal to move from one node to another. You will only be able to connect outputs to inputs.
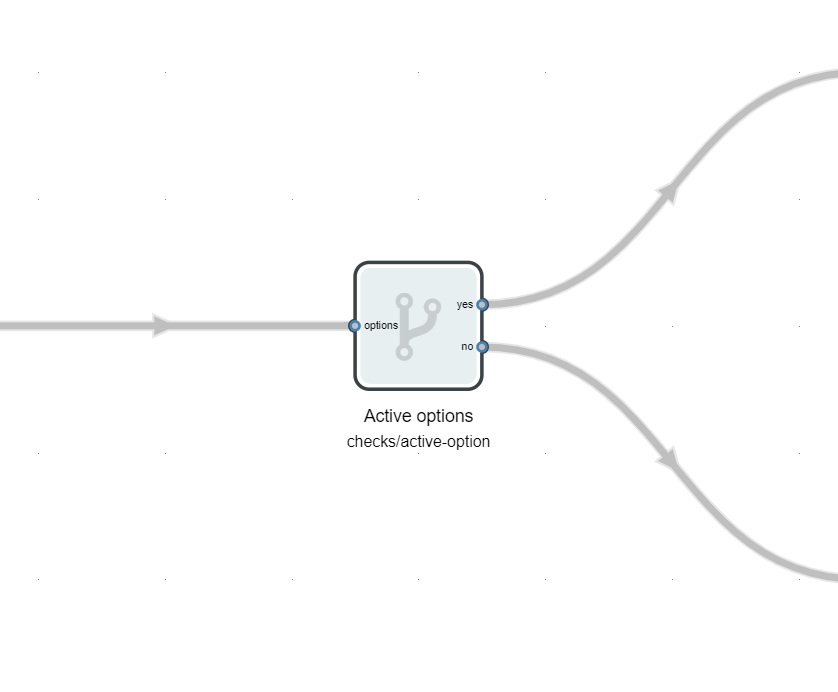
Some nodes have two output points. As you can see from the image above, the upper output point will be used when the conditions checked within the node are ‘true’, the bottom output point will be used when the conditions checked within the node are ‘false’.
Check & Active
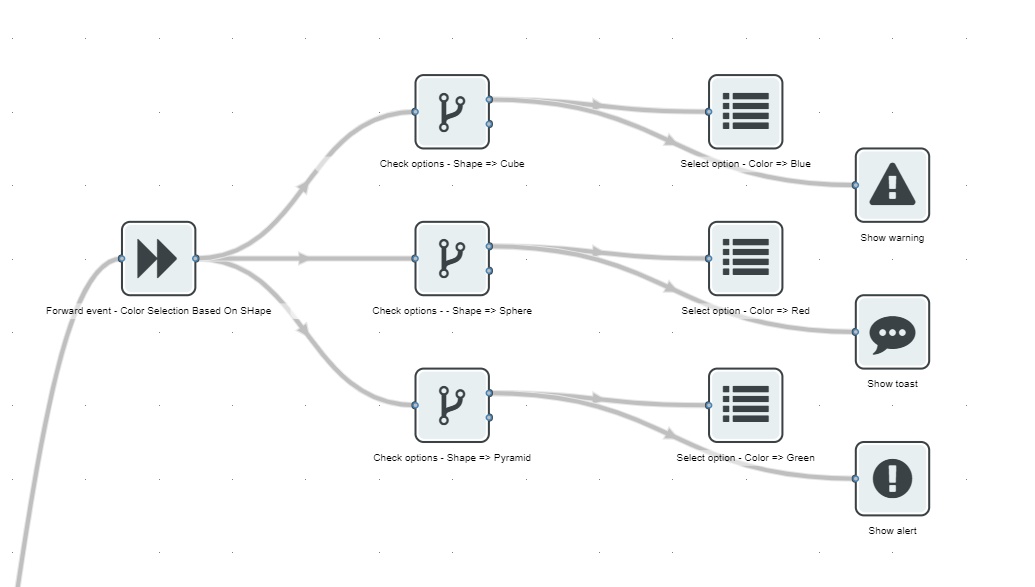
Shown in the example below you see two nodes that are used to check the condition of selected options, however, the method of checking the condition between these nodes is different.
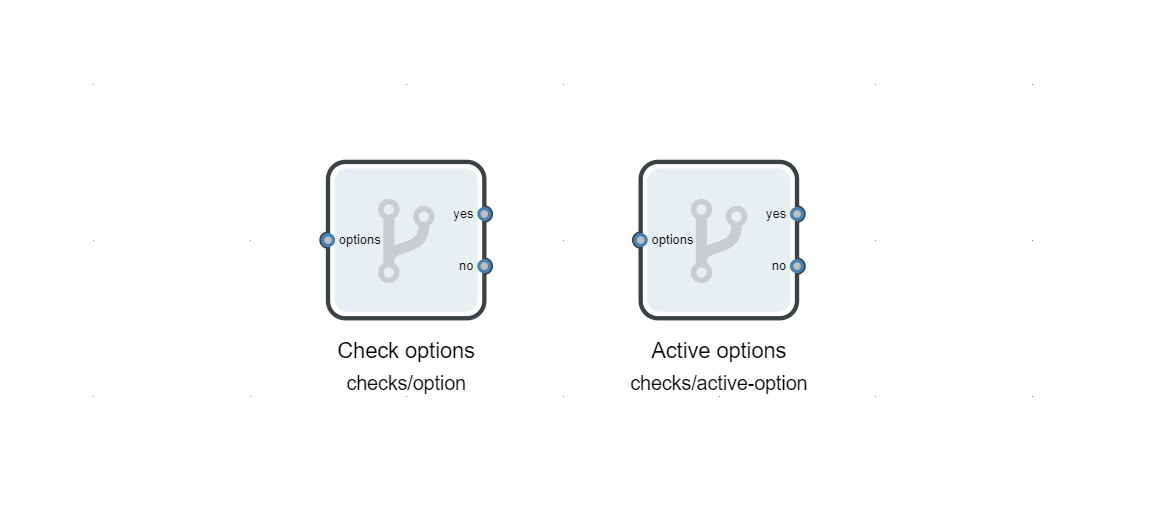
Check
The check options node only passes on the incoming signal if the specified attribute condition was responsible for generating the signal in the broadcast node. This type of check allows you to perform an action that isn’t necessarily always true but only after that specific event in the configurator.
Active
The active method checks if the condition is active at the moment the signal comes in. Meaning it will look at the condition defined within the rule and see if that condition is being – or already selected at that time. In contrast to the check option node, this node will always check if the specified condition is true, regardless of which event created the option changed broadcast signal.
It is very important to understand the fundamental difference between these two methods as both offer a unique outcome.
Rule-node Conditions
Some rule nodes have an additional option to define in which way the condition is being checked or the action is being executed. These two can be found under either ‘Apply on’ if we’re talking about action type nodes or ‘Condition’ if we’re talking about check type nodes.

Apply on
Within visibility nodes there are three options on how to execute the actions defined within the node.
In visibility nodes, checking a box means that the specified option, question or material should be hidden while an unchecked box means it should be visible.
“Apply on all” means that all visibility actions, checked and unchecked boxes, will be executed.
“Apply on only visible” will ignore any checked boxes and show the items that have unchecked boxes.
“Apply on only hidden” will ignore any unchecked boxes and hide all items that have a checked box.
Because the “only hidden” and “only visible” conditions only set their own visibility state, these modes can be used alongside other visibility nodes without having the “full override” effect of the “apply on all” condition.
Condition
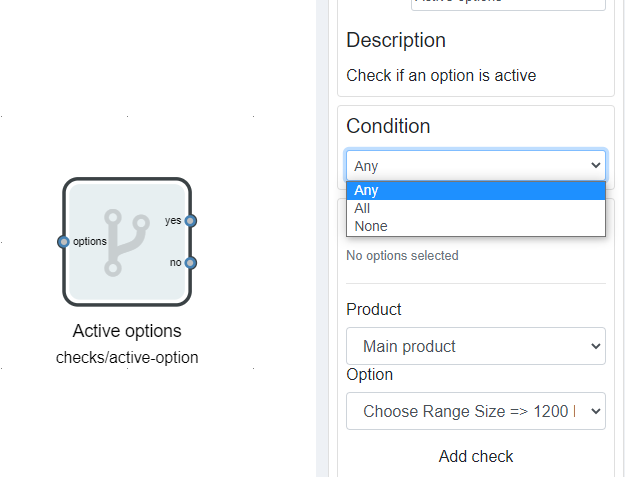
Within some of the check type nodes you will be able to define how the check will be performed.
When selecting Any the node will look at all the different checks that have been defined and if one of these checks meet the condition defined, the ‘true’ output will be used.
If All is selected the ‘true’ output will only be used when all conditions within the rule node are met.
None works in opposition to All, if no options that are being defined are true, the ‘true’ output will be used. Selecting “none” is virtually the same as using the “no”output. For legibility reasons it is usually clearer to use the no output with the “any” condition instead of using the “none” condition.
Basic Rule-Nodes
Broadcast
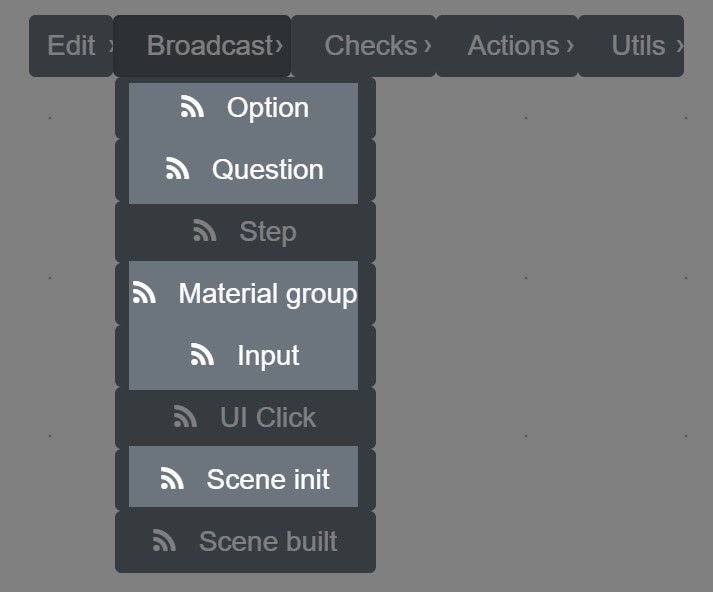
Option
The option broadcast generates a signal if any option is changed. If an option is set to the value/state it already is, the option broadcast will not generate a signal
Question
The question broadcast generates a signal whenever a dropdown menu is opened (without actually selecting something) or clicking/changing on a step. This broadcast is usually used to change cameras since it indicates that the user is engaging with a particular question but nothing was actually changed configuration wise.
Material Group
The “material group changed” broadcast generates a signal whenever a material is changed. This can be either through the user clicking a material as a configuration option or as the result of a rule selecting a material. Contrary to the option broadcast, selecting a material that was already selected will generate a new signal in the material group broadcast. This means that it is a lot easier to create infinite loops with this broadcast which will result in a frozen configurator viewer.
Input
The input broadcast generates a signal whenever the user interacts with an input field such as operable_inputs or text_to_image.
Scene Initialization
The scene initialization broadcast generates a signal whenever the page is loaded for the first time. This can be used to set complex default states but can be somewhat unpredictable since the technical state of “initialization” is not always what you would expect. Preferably, default values for attributes should be set in the attributes.
Checks
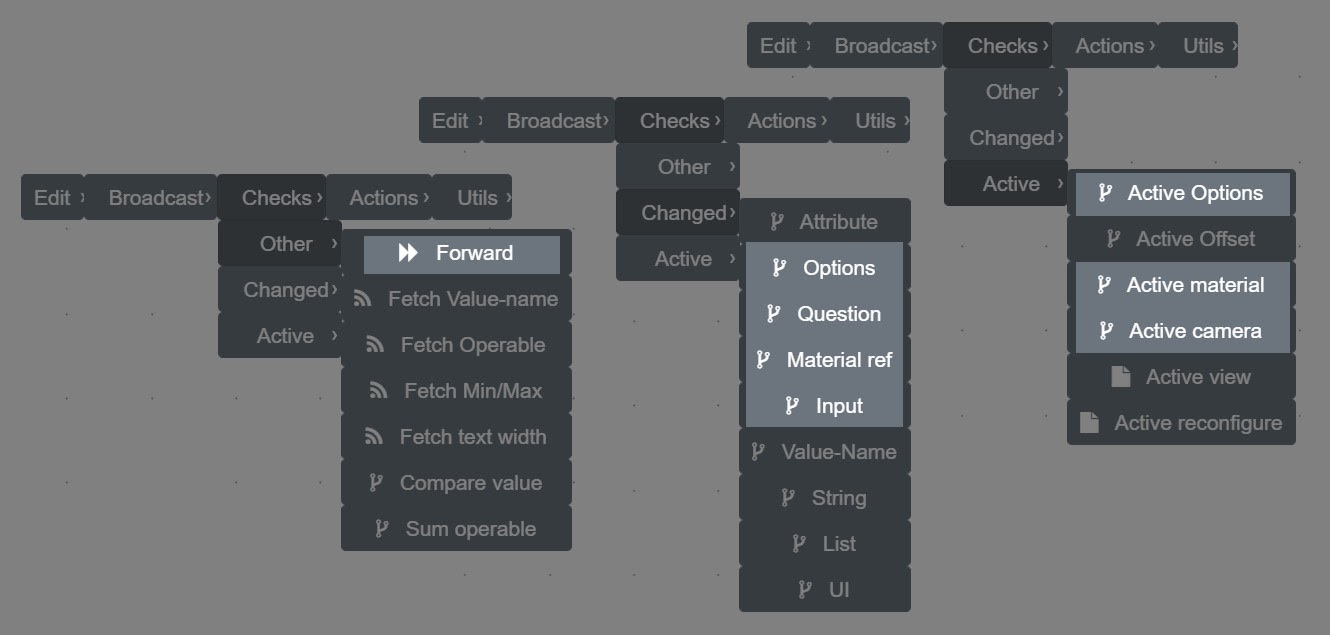
Forward
This node doesn’t exactly fit the description of a check node and does not add any functionality but is an invaluable tool for organizing the node layout. The forward node takes any signal and simply passes it on. It can merge different inputs so that nodes in the ruleset can be reused.
(Changed) Options
When the “check options” node receives a signal it checks if the specified option was the cause of that signal. This is useful for very deliberate choices that don’t need to have a continuous effect. For example, choosing a desk width of 1 meter should also select a privacy screen of 1 meter wide (like a suggestion). After the screen has been forcibly changed to a 1 meter width the user can still change it back if they prefer something else. When using the “active option” check it would force the width change every time an option changes effectively removing any choice for the screen.
(Changed) Question
This node should only be used in conjunction with the “question changed” broadcast node. It checks if the specified question is the cause of the signal from the broadcast node.
(Changed) Material ref
This node checks if the specified material change is the cause of the signal from the broadcast node. The “check material ref” node can only be used when using a “material group” broadcast node.
Check input
This node checks if the specified input was responsible for generating a signal in the broadcast.
(Active) option
The “active option” node will check the state of the specified option every time a signal is received. Because this node tests the specified option every time a signal is received it becomes a very powerful logic tool (when x changes, if y = true, then do z).
(Active) material
This node checks if the specified material is currently active. The “active material ref” node should primarily be used in combination with the “option changed” broadcast node since it can easily create infinite loops with a material changed broadcast.
(Active) camera
This node checks if the specified camera is currently active. This is often used to check if a camera that you want to switch to is already active, so that you don’t accidentally go back to the initial position.
Actions

(Select) Option
This node is used to select options within a question attributes.
(Select) Color
This node selects a color option within a color attribute.
(Select) Camera
This node selects a camera.
(Nodes) Offset
The “set offset” node can translate predefined offset groups. The position of the offset group will be “set” to the value that is specified. If you want to translate along multiple axes independently you have to give each translation its own “level”.
(Nodes) Rotate offset
This node allows the rotation of an offset group. The desired pivot point on the model should be moved to the origin (0,0,0) in the 3d file. The object should have its transformation values frozen/reset/locked and then translated back into place where it belongs in the scene.
For example, increasing a table’s width requires an offset of the legs along the x-axis. Increasing the table’s depth requires an offset along the z-axis. This is done through two different offset nodes. The first node will have a level of 0 and an offset of x = 0.5, y = 0, z = 0.The second node will have a level of 1 and an offset of x = 0, y = 0, z = 0.25. The values of the different levels are combined to create a final position.
The speed is the amount of time it takes to finish the rotation or re-position expressed in seconds.
(Nodes) Matgroup/ Set material
This node can select a specific material within a specific material group. As a side note the material group does not need to be added to the attribute list in order to change the material option within rules. This node is not used to assign materials to meshes without material groups. These need to be assigned in the 3d software of choice.
(Attributes) Input value
This node is used to place a value, either text or numbers, within a text_to_image or text_input attribute.
(Attributes) Update Attribute
This node can be used for a number of things based on the rule node that is to be updated. As an adjustment that applies to all types of attributes, you will be able to update the attribute name.
Within text_to_image attributes a number of parameters can be manipulated, these include: the outline, text color and outline color parameter.
Within the image_upload attribute you will be able to control the height – width ratio of the uploaded image and assign a different material on which the uploaded image will be applied
(Attributes) Set Color
This node allows you to re-define a diffuse color that will replace the current color within a material.
(Attributes) Set Map
This node can be used to override a texture slot like diffuse, normal, alpha and so on. This can be applied for either a single texture or an entire material group.
(Messages)
Message rule nodes allow you to create a pop-up in which you will be able to define the text displayed within the pop-up. You are able to choose from three different types of message rule nodes: Alert, Warning and Toast, however the difference lies within the styling of these pop-ups, it is basically the same.
(Visibility) Hide question
This node hides a single question in the user interface.
(Visibility) Show question
This node makes the specified question visible in the user interface.
(Visibility) Color Vis
This node can control the visibility for all options within a specific color attribute.
(Visibility) Option vis
This node can control the visibility for all options within a specific question attribute.
(Visibility) Question vis
This node can control the visibility of multiple questions at once, as opposed to the single question visibility of the “show’’ and ‘’hide question’’.
(Visibility) Material vis
This node can hide materials within a specified material group. Note that when a currently active material is hidden in the user interface, it is still active in the viewer.
(Visibility) Disable Option
This node can disable options within question attributes. Contrary to hiding or showing options, this rule node can be used to grey-out options that should not be available.
As a side note, rules can always override any defaults visibility settings that are defined within the attribute list.
Guidelines
As well as understanding the functions themselves it is equally important to create rules using a set a basic guidelines in order to make your work readable and transferable. These include, Rule node naming, spacing rule nodes and the size, readability and recycling of rule nodes within your rule-set.
Rule-node Naming
As displayed on the image below you are able to re-name every individual rule-node according to the function it is performing. This is very useful as you will be able to see in an instance what every node represents. This will make revisit previously created rule sets and transferring your work much easier.
Rule-node Spacing
Providing some space in-between rules nodes will help reading rule-sets and adjusting or adding new nodes without having to move nodes in order to create move space.
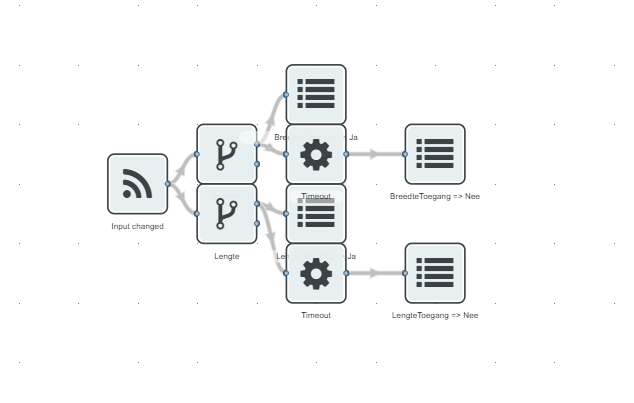
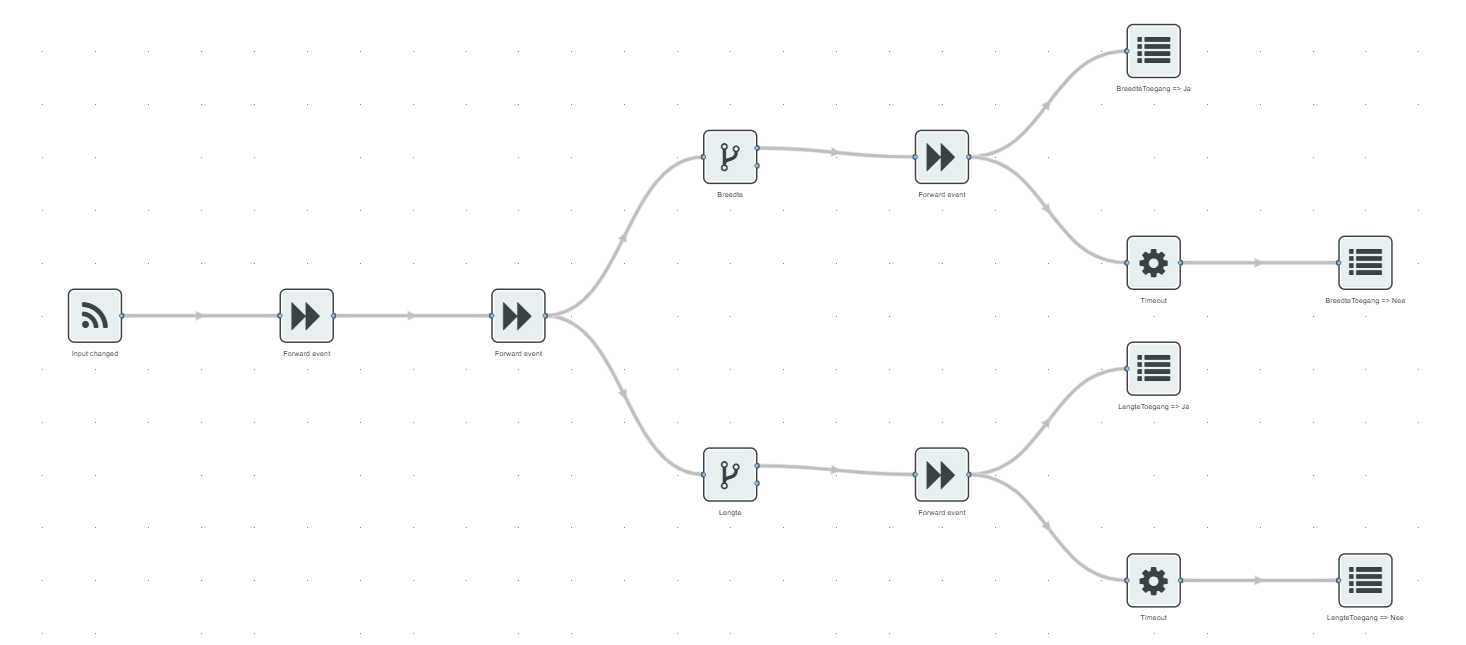
The image below displays two variants of an identical rule-set in terms of functionality.
The left image shows a rule-set in which the nodes are cramped together, even the name fields are unreadable as the nodes are placed directly adjacent to each other.
The right image displays a rule-set in which the nodes have been appropriately distanced from each other. Reading and/or adjusting this will be much easier.
Rule-set Size
Technically speaking there is no limit to rule-nodes per rule-set, however creating a large amount of rule nodes within a single set will have effect on the performance while adjusting rules and opening the rule-set. Therefor it is advised to create an average of 120 rule-nodes per rule-set as creating more than this amount might even bar you from opening the rule-set entirely due to a too long loading time.
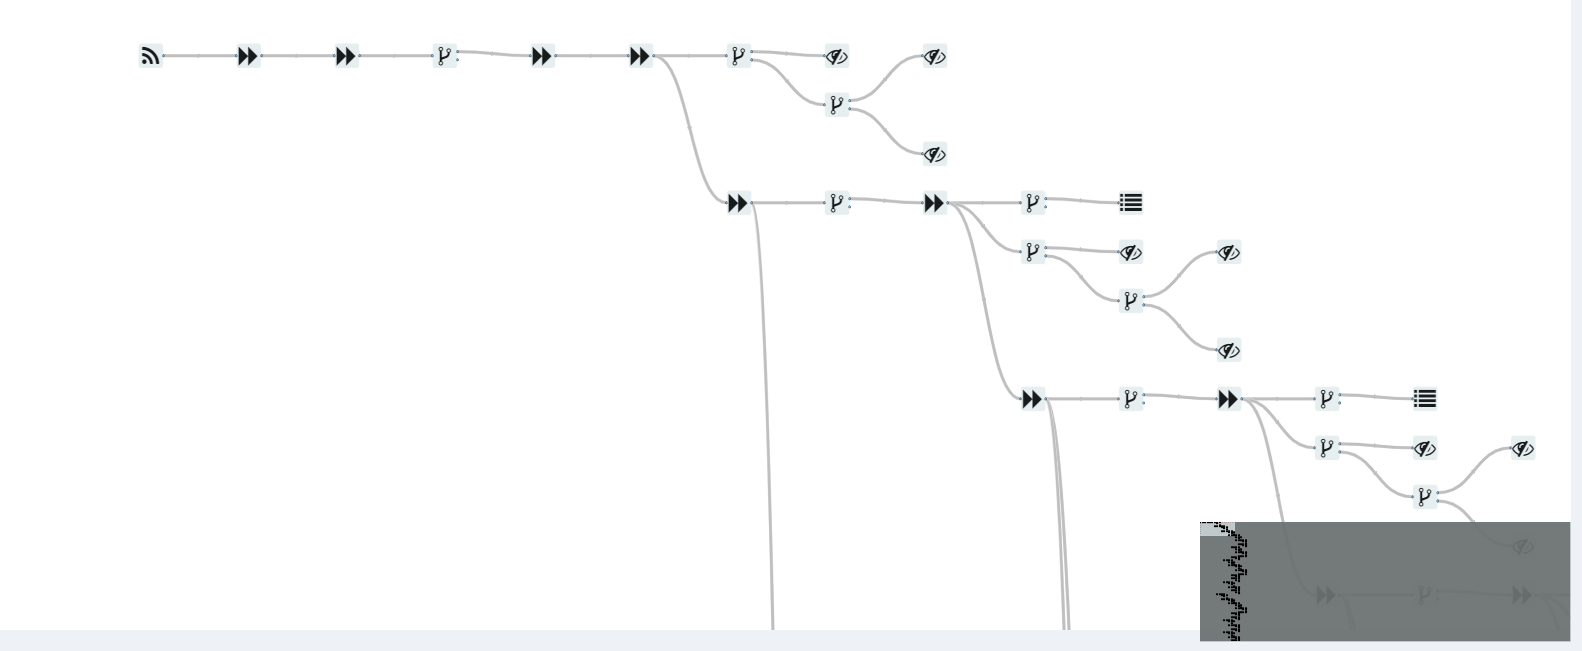
Rule-set Readability
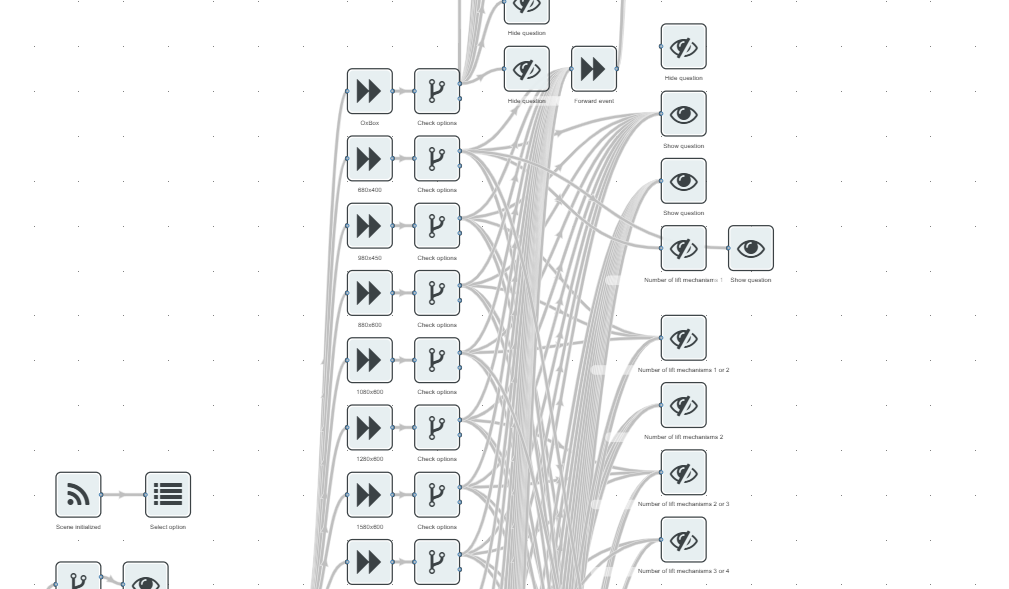
The image below shows an incorrectly created rule set in terms of readability, especially the designated paths that have been create show no real direction. Working in this manner is not preferable.
Keep in mind to always use forward nodes in order to split-up and/or re-direct rule-sets in order to avoid situations as presented in the image below.
Use forward event nodes when receiving or expanding to over 2-3 rule nodes.
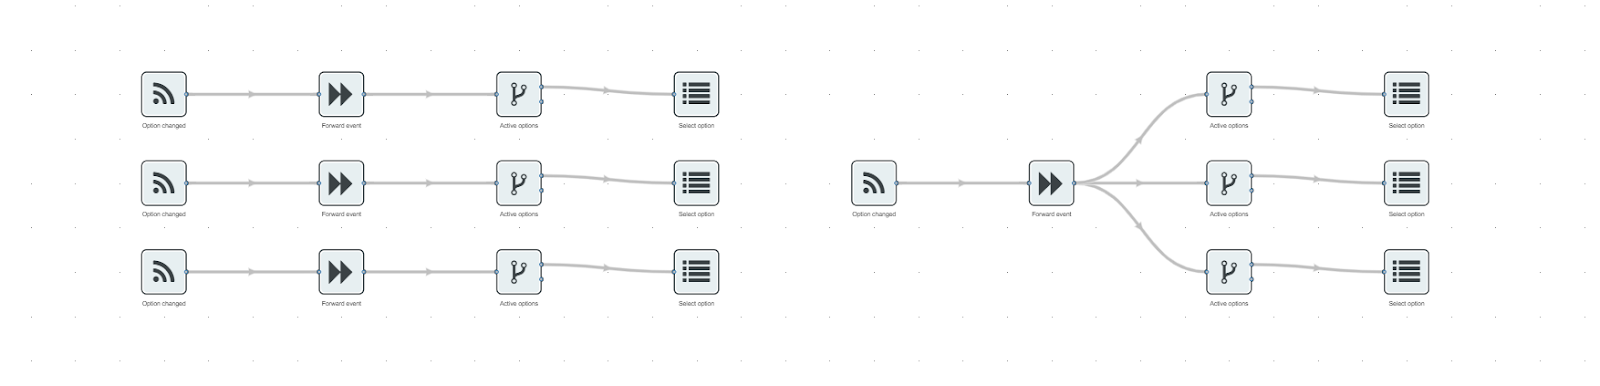
Reusing Rule-nodes
Re-use rule-nodes as much as possible, the image below shows using multiple broadcasts even though using one of these broadcasts-node will suffice. By adapting to this principle you will be able to create a much smaller rule-set while still defining the same functionalities.
Make sure to branch out your rule sets and re-use any rule-node that are already defined. In turn this will also allow for more rule-nodes within a single rule-set without having to create a second rule-set in order to finish the function you are defining.