Table of Contents
Short introduction
Scalable Vector Graphics or SVG is a graphical file format that takes makes use of layers. Users of Adobe Photoshop and similar software applications will be familiar with the use of these layers. Within the Expivi platform the usage of SVG will give you the freedom of not only uploading images and the input of text but also gives a free range in; positioning, scale, and rotation of these elements on the 3D product within Expivi.
SVG is particularly used when the customer wants to generate a print-ready file of the customization of the product.
You can use the following SVG attributes to do so:
- SVG element
- SVG Text
- SVG image
- SVG image selector
- SVG element selector
- SVG canvas
Inkscape
Inkscape can be downloaded here
Before we start on anything in expivi we must have some knowledge about Inkscape. Inkscape is a free open source vector graphics editor used to create vector images, primarily in Scalable Vector Graphics (SVG) format. Other formats can be imported and exported.
Inkscape has many possibilities from which we will only use a few. To start setting up your document you will always need the following.
Document properties
This can be found under File>Document properties or Ctrl+Shift+D
Within the document properties, you define the size of the print-ready output. This is defined by the print-ready file provided by the client. The size can be filled in under Custom size. Do not forget to set this to px instead of mm. If the client does not have a specific file size, make this 2048×2048. This way you do not have to do anything weird with your unwrap.
Objects
This can be found under Object>Objects
Here you can find the layers of your document. Make sure that when you create a new object clearly label these so you know what is what.
XML editor
This can be found under Edit>XML editor or Ctrl+Shift+X
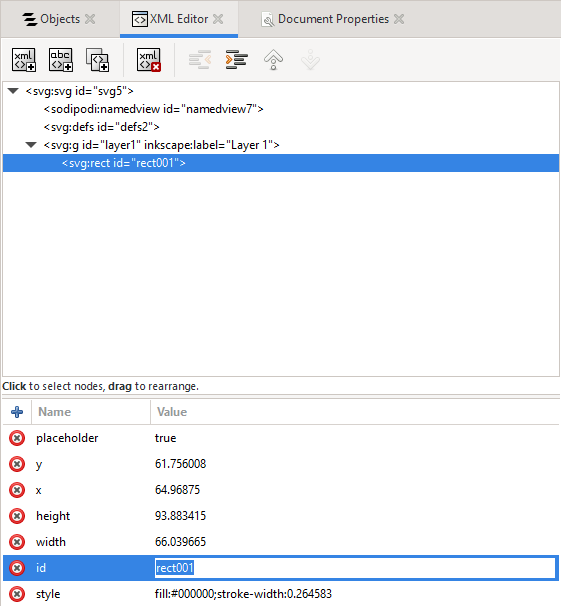
This is the most important of them all. Everything you create will be shown here with all underlying data. Everything that you create that should be linked has to be named clearly behind the ID. This is what you are going to link to your SVG attributes, so it is important that you can find these back easily.
Shapes
For our SVG file, we are going to mainly need shapes. There are two shapes that you are going to use a lot/ The first one is the rectangle. This can be created by going into the left-hand panel and clicking the blue
![]() rectangle or by pressing the R key. You can create a rectangle by dragging it over the canvas. It will generate a rectangle which you can then change to be the exact size by going to the top left corner and changing the W value and the H value. You can round the corners of the rectangle by filling in a value behind the Rx.
rectangle or by pressing the R key. You can create a rectangle by dragging it over the canvas. It will generate a rectangle which you can then change to be the exact size by going to the top left corner and changing the W value and the H value. You can round the corners of the rectangle by filling in a value behind the Rx.
The second one is the circle. This can be used for very specific curves in the output. This can be very useful in complicated print-ready files.
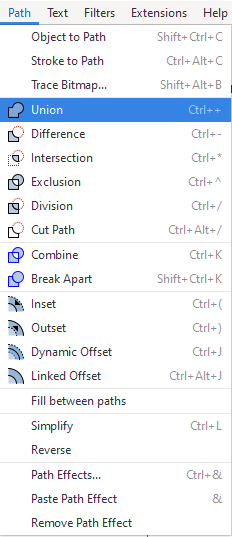
You can combine these shapes by selecting all shapes and going to Path>Union or Ctrl++. There are also a few other handy boolean options. These can all be found under the Path dropdown.
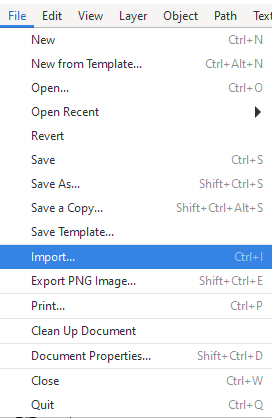
If the customer has a specific print-ready output that they request we would need a reference image of the unwrap. This can be imported by going to File>Import.
Setting up in Inkscape
We will now go over all the building blocks you will need to be able to set up your SVG file in expivi. When you create your SVG file make sure to give every element a clear and unique ID. This way you can easily assign and identify them in Expivi.
Reference image
If you are going to create an SVG file with a specific print-ready file it is always good to work from a template. You can do this using a UV snapshot of your unwrap. This way you know where to create your elements so everything will align perfectly. You can import images by going to File>Import.
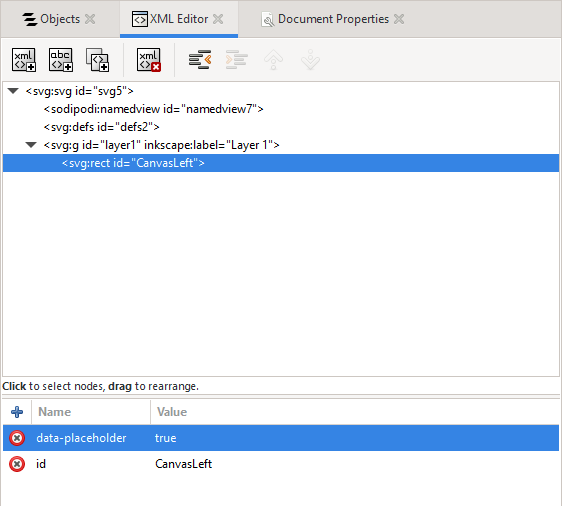
If you are done with creating your SVG file you can simply delete your reference image or go into the object in the XML editor and give the reference image the attribute data-placeholder is true to ensure that the reference image is not visible inside Expivi.
SVG Text: Inline
Required in Inkscape: Text line
With this attribute, you can add text to the 3D model just like you would with a text-to-image attribute. There are two ways to use the SVG text attribute, Inline and multiline text. For an inline text, you will need to add a piece of text onto the location of your print-ready file where you want the user to write and give this a clear and unique ID so you can find it back in expivi. This placeholder text will not be visible in Expivi.
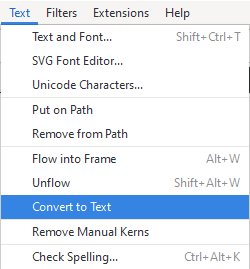
After you have created the placeholder text you will have to go to Text>Convert to Text. This way Expivi will know this is will be an inline text.
SVG Text: Multiline
Required in Inkscape: Rectangle, Circle, or Path (combined shapes)
Using the multiline requires a different approach than the Inline. Instead of creating some text we will create a shape and give it a clear and unique ID. This can be any shape you want. This one will be where the text will be displayed on.
If you want this text to have a mask you can create a second shape for this and give it also a clear unique ID so you can find it back in expivi.
The pro of having a multiline text is that once the text reaches the end of the bounding box, it will jump to the next line.
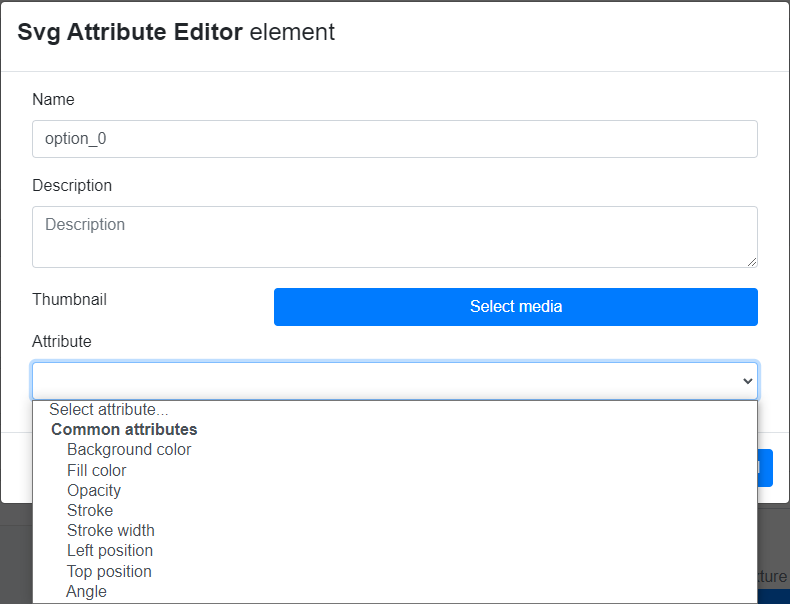
SVG Element
Requires: SVG text attribute in expivi
The SVG element is used to manipulate/adjust the properties of text elements. This is mostly used to add preset color options for text.
SVG Element Selector
Requires: Preset patterns you want the customer to select
With the Element selector, you give the end-user the option to select a preset pattern which they then can manipulate with color later on. If you don’t want to give the customer the opportunity to change the color of the pattern you might also use the image selector which doesn’t require you to preset the images in your SVG file.
SVG Image
Required in Inkscape: Image (Can be any image)
With the SVG image attribute, you are able to let the end customer upload an image that they can then place across the 3D model. To add this you have to first define an area where the end customer can upload. You do this by importing a placeholder image and giving this a clear and unique ID in the XML editor.
SVG Image selector
Required in Inkscape: Rectangle, Circle, or Path (combined shapes)
The SVG image selector is a great way to set pre-set backgrounds. With the image selector, you can add some preset images or patterns to your SVG that the end customer will be able to select. If you want to add this to your configurator you have to create a shape in your SVG file where you want this pattern to be and give it a clear and unique ID so you can find it back in expivi.
SVG Canvas
Required in Inkscape: Rectangle, Circle, or Path (combined shapes)
SVG canvas combines a few other SVG attributes into one. The SVG canvas gives you the freedom to upload text and images onto a 2D canvas and drag it around freely. To set this up you will simply have to create a shape where the canvas will be and give this a clear and unique ID so you can easily find it back in expivi.
Setting up in Expivi
Once your SVG file is ready you can go ahead and upload this to the media library. To be able to link this to the correct attributes we will first have to assign the SVG file to a material. We can do this by assigning it as a diffuse map in the material that is assigned to the 3D model for which we created the SVG file. The material type that works best for SVG is the MeshPhongMaterial, we encountered that some others may interfere with the print-ready file.
Linking attributes
Before an SVG attribute will work you will have to link it to the SVG element. You can do this by going into the attribute properties>Assigned texture>Please assign a texture. You will get a pop-up of all SVG files that have been uploaded into the media library. Select the SVG you have created for this product.

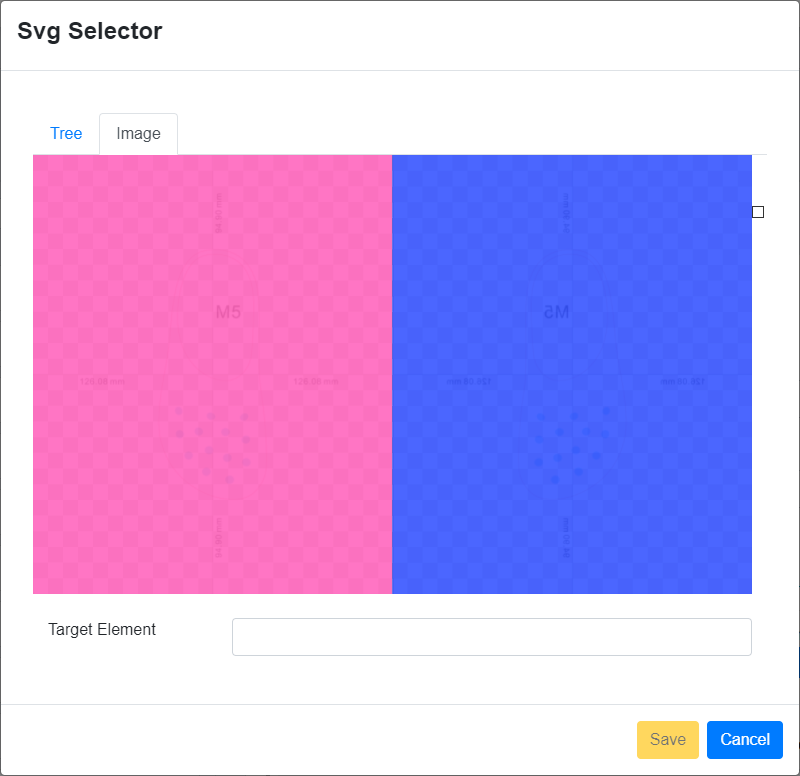
Once you have assigned the SVG file you will assign the element to the correct attribute you are in by going to Selected element>Please select an element. This will bring up a pop-up with two tabs, Tree and Image.
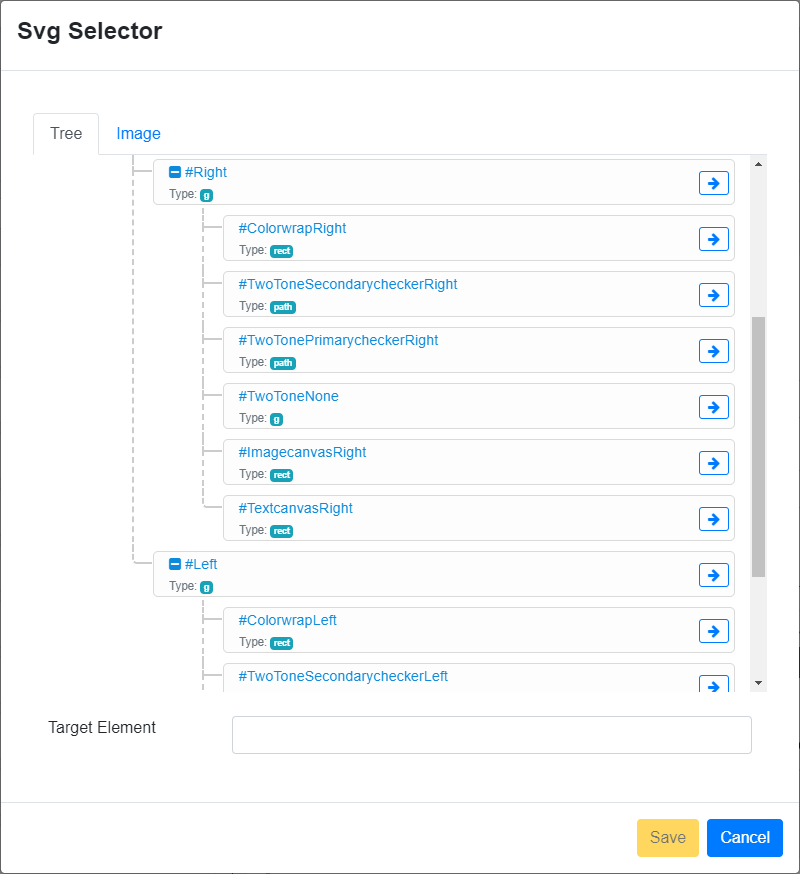
Go to the element you have created for this attribute and assign it by pressing the arrow behind the option. Some attributes require/have a clipping element slot. This functions as a mask over the selected element. Anything outside of the mask will be left out in the print-ready file.
You can assign this clipping element by going to Clipping element>Please select an element. This will bring up the same pop-up as the select element but this time you will go to the element you have created as a mask and assign it by pressing the arrow behind it.
Attribute properties
Every SVG element has a different set of attribute properties. With these, you can alter the attribute to the boundaries set by the client.
SVG Text: Inline
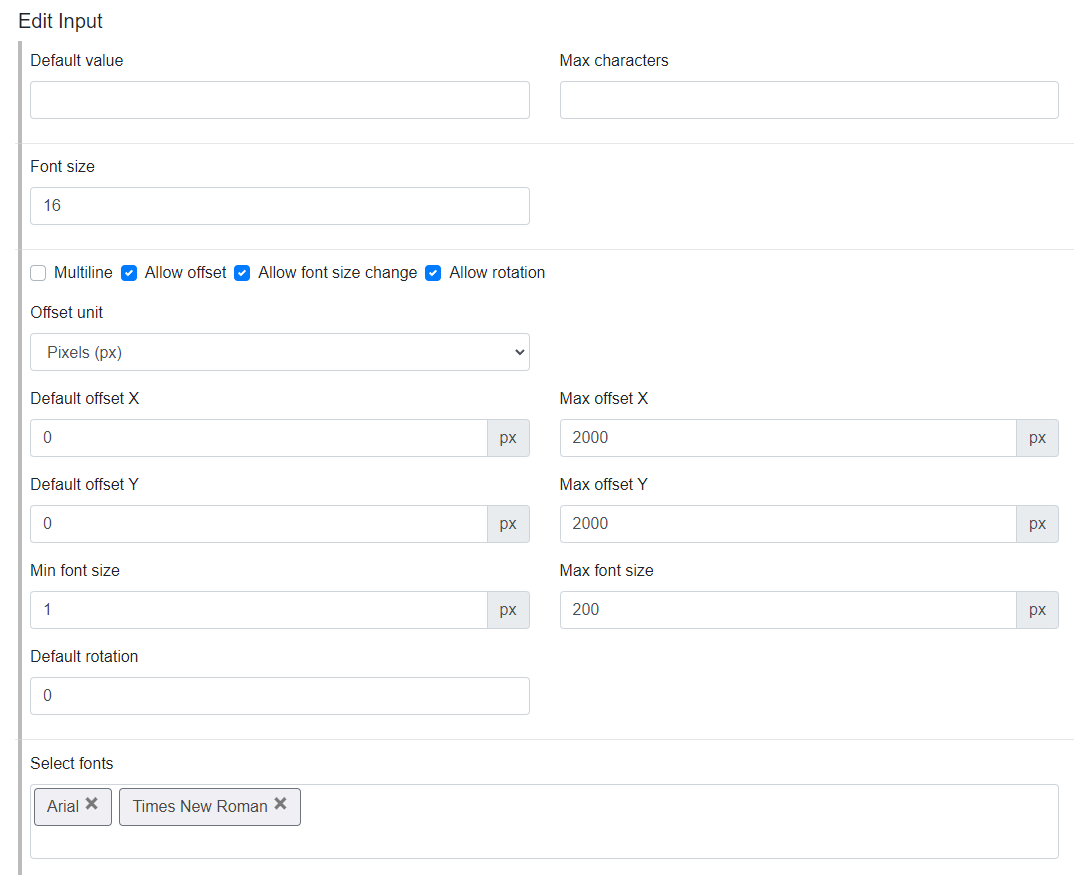
You can set up an inline text by doing the following. First link your SVG through assigned texture, then your selected element and if necessary lastly your clipping element like explained above. If this is done you have successfully linked your SVG file to your SVG text attribute. You can then proceed with setting up the limitations of the attribute. You can fill in a default value, max amount of characters, font size, font min and max, allowing offsets and rotations, and upload custom fonts.
Note regarding the font-size: these are in px, not in pt.
SVG Text: Multiline
You can set up a multiline text by doing the following. First link your SVG through the assigned texture, then proceed to the checkbox that says multiline. This will allow you to select your shape as a selected element. if necessary lastly select your clipping element like explained above. After this step, make sure the multiline checkbox is still selected. If this is done you have successfully linked your SVG file to your SVG text attribute. You can then proceed with setting up the limitations of the attribute. You can fill in a default value, max amount of characters, font size, font min and max, allowing offsets and rotations, and upload custom fonts.
Note regarding the font-size: these are in px, not in pt.
SVG Element
You can set up an SVG element by doing the following. First link your SVG through assigned texture, and then the selected element that you want to change the properties of. With the SVG element, you can adjust the properties of other SVG elements. For example, this is mostly used in changing the color of the text. Create an option and fill in what type of attribute you want to change the properties of. This list consists of Background color, fill color, opacity, stroke, stroke width, left position, top position, and angle. These options are pretty self-explanatory and there are endless possibilities. The best with these is to just try them out.
SVG Element selector
You can set up an SVG element selector by selecting the assigned texture which contains the elements you want to select. Element selector can be used if you want the customer to select predefined images that can be changed later on with the SVG element. You predefine these images in your SVG file and give them a clear and unique ID. You can then link these ID’s to the options in your SVG element selector.
SVG Image
You can set up an SVG image by doing the following. First link your SVG through assigned texture, then your selected element and if necessary lastly your clipping element like explained above. If this is done you have successfully linked your SVG file to your SVG image attribute. You can then proceed with setting up the limitation of the attribute. You can allow the customer to offset, scale, and rotate their uploaded image. Limit the number of pixels they can offset, limit the scaling of their offset and limit the minimum requirements of the uploaded image.

SVG Image selector
You can set up an SVG element selector by selecting the assigned texture and the selected element on which the images will be placed. This one works best if you have more images that do not require any further configuration.
SVG Canvas
You can set up an SVG canvas by doing the following. First link your SVG through assigned texture, then your selected element. The SVG canvas will create its own clipping element based on your selected element. If this is done you have successfully linked your SVG file to your SVG canvas. You can then proceed with setting up the limitation of the attribute. You can limit the number of images the end customer can add to their canvas and the minimum requirements of the images.
Sadly it is not possible to change the properties of the text yet in this attribute.

Troubleshooting
When working with SVG you might run into some problems when you think you have set it up correctly. Here are some things you might run into while working with SVG.
Black SVG object
It might happen that you have just successfully set up your SVG, you go test it on the test environment and see that your entire SVG object is black. This happens once your SVG material does not have the transparency checked on. Make sure that you do this once you create your material.
SVG canvas not showing
Sometimes it might happen that you have successfully set up your SVG canvas but when you test it will not show your canvas. What you can do as a workaround is add a new layer in your SVG file, give it the command placeholder=true and connect an image selector to it. This should fix the issue not showing.
It is also possible that your SVG canvas is not in a step. If this is not the case your SVG will not work.
Showing SVG file on the object
If your SVG object is showing the color of your SVG file it might be that your attributes have not been properly linked. First, check if you used the correct element in your SVG file (image/shape). If this is all correct you can check all your attributes have been linked correctly.
Once all of these are in the correct place you can lastly check if all attributes that can have options also have these. It might be that your SVG element has an option but it is not filled, for example, then it will not show linked on the object.
Only after all attributes are correctly linked and nothing in the SVG file is disconnected the SVG will show correctly.