Table of Contents
What is Palletization?
The SVG Palletization option gives your the ability to force a selection of colors to an SVG image uploaded by the customer. This can for instance come in handy if you are only able to print a limited amount of colors.
How does Palletization work?
Palletization works with an algorithm that looks at the colors of an uploaded image and combines them into a predetermined amount of colors. In our backend we can set this amount. So for instance if you upload an image with 12 colors, and the palletization color count has been set to 5, the algorithm combines the closest colors until there are 5 colors left.
The palletization attribute also allows you to pre define a set of colors that can be selected to replace the original colors.
Note: This feature only works if a .SVG file is uploaded in the image uploader on the frontend.
Setting up Palletization
To set up Palletization we first need to add a SVG image attribute in our backend. You can do this by navigating to Configure → Attributes → Add attribute → svg_image.
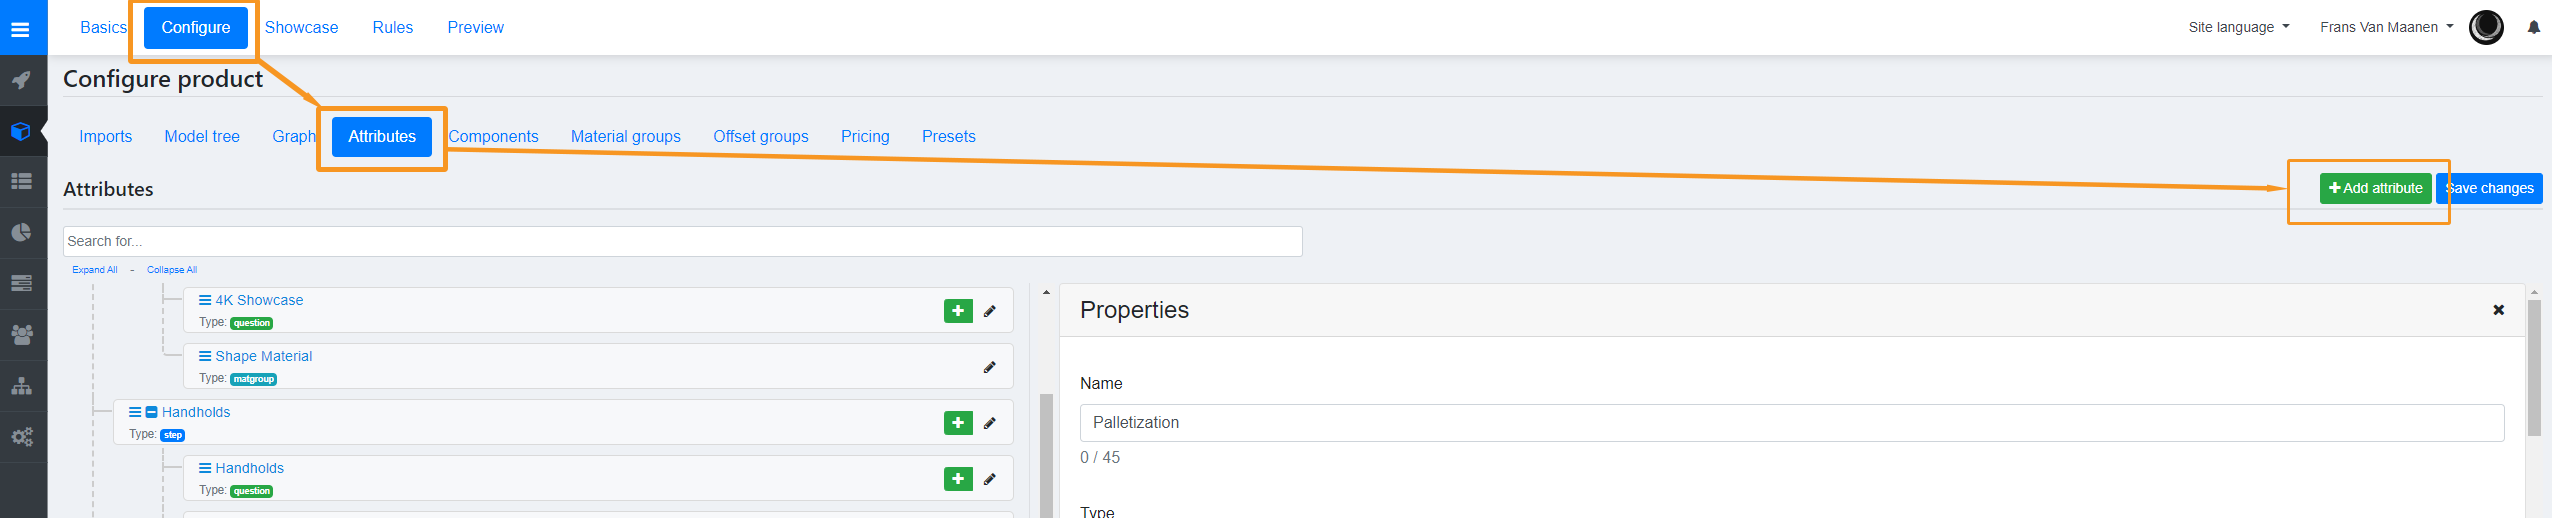
Now that we have our attribute, open the properties by clicking on the pen icon next to the attribute. This will open up the options. We now need to link the correct material to our attribute. To learn more on how to set up SVG attributes and files, please visit our SVG Documentation page. Scroll down to see the Allow palletization checkbox and enable it.

Color count
Now we can set our maximum Color count. The number represents the maximum amount of colors that can be detected in the image. Images containing more colors than this input will be reduced / merged using color distance approximation.
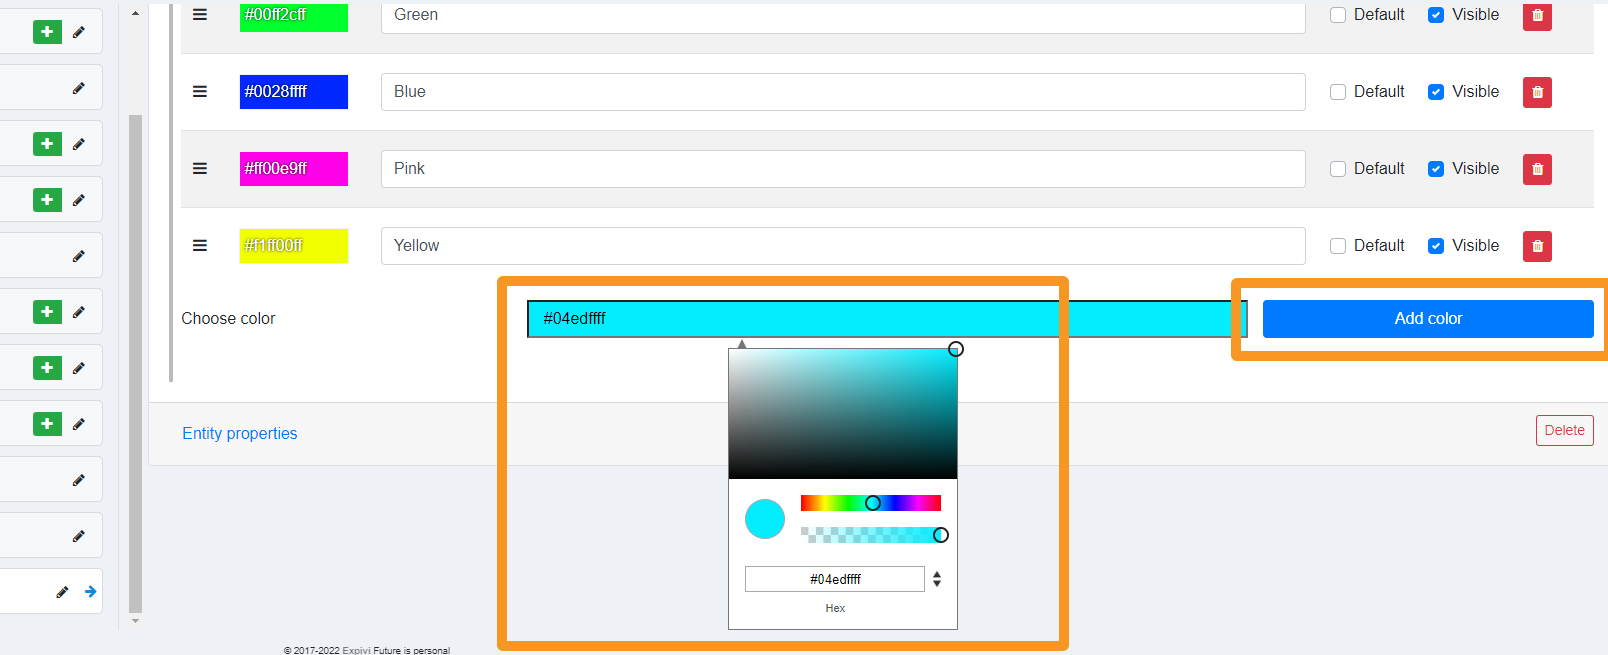
Allowed colors
Here we can set the colors that are used to override the original colors of the image. When set, the override colors can be selected by the user. The default color will be used as a starting color for the whole image. To add color options click on the Color bar and select a color from the color picker. Alternatively, you can insert a hexcode manually. After you selected the correct color, click on the Add color button on the right. The color is now added to your attribute and will be visible in the frontend.
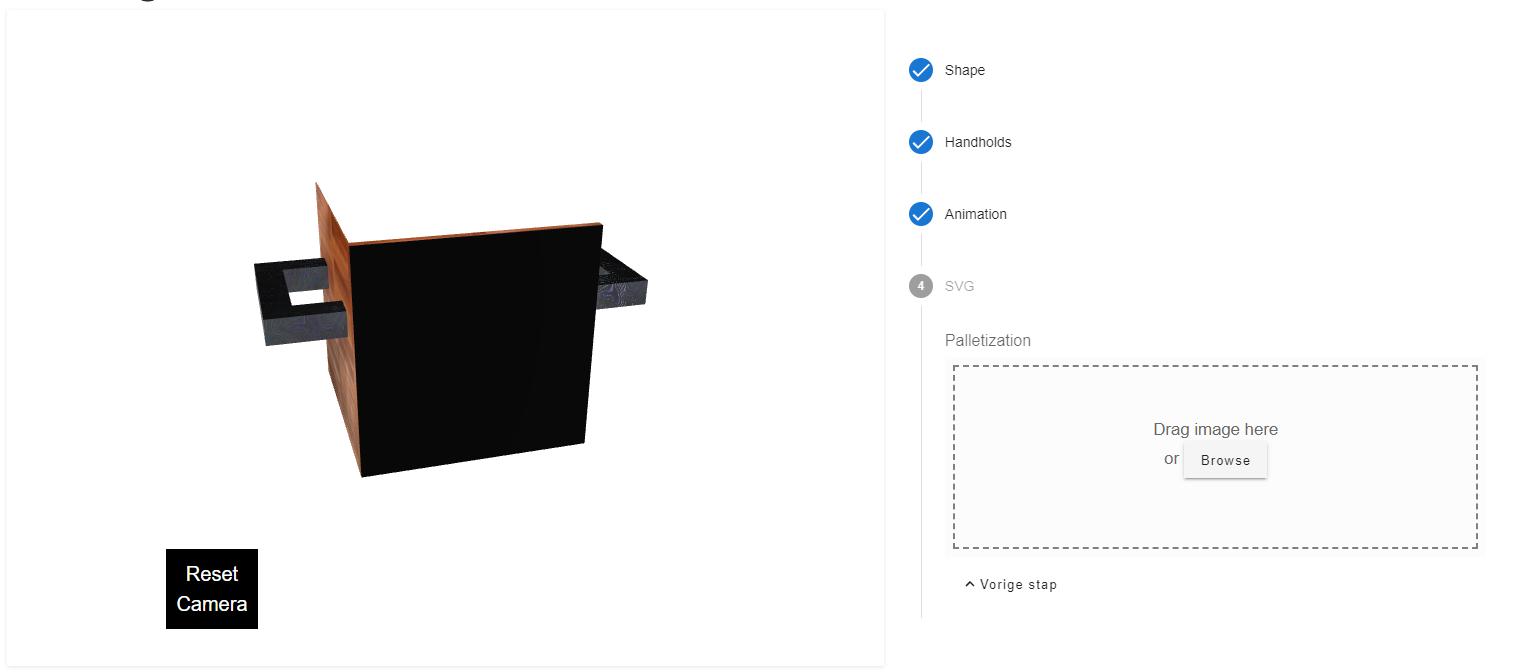
Example Scene
After adding the SVG image attribute, connecting it to the right material and saving your attributes, we have a working image uploader on the front end. This can look something like the example below.
Here we can add a .SVG image to work with. In this example we have used an image of a tiger.
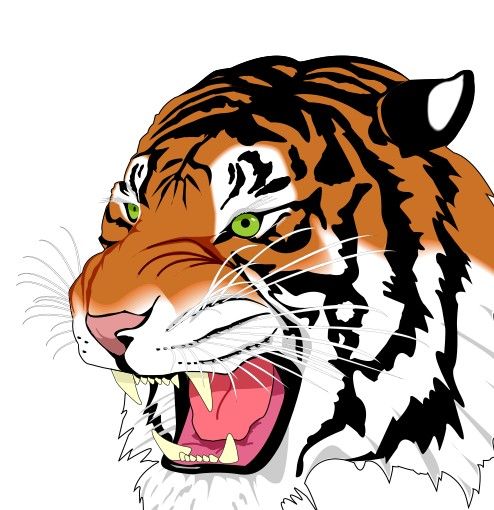
You can download the file here: tiger
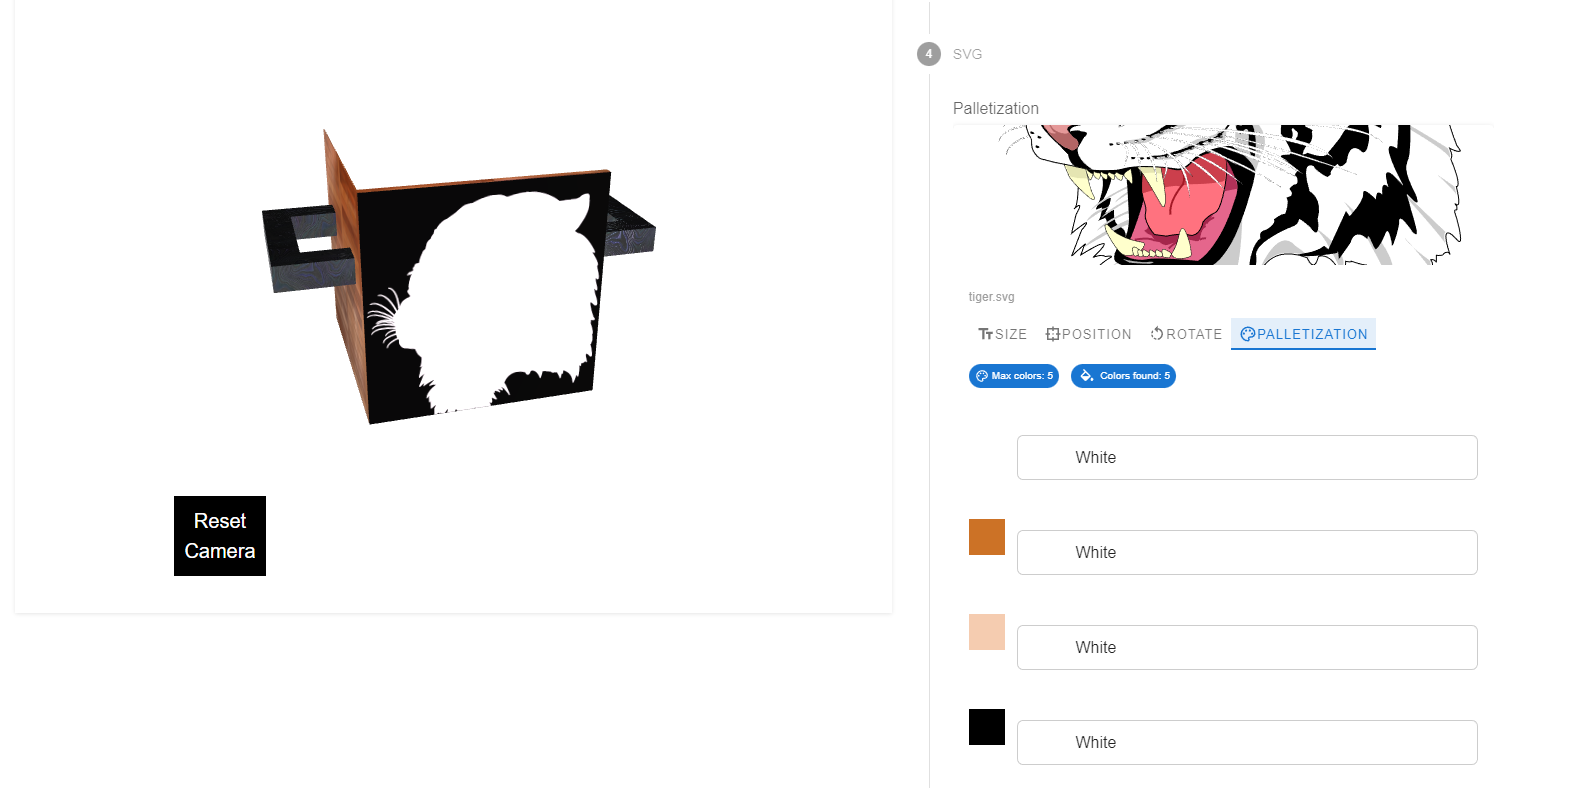
When we drag that image onto the image uploader, the tiger will become visible on our SVG plane. Since we set the default color to white, the entire image will be white. If we click the Palletization tab on the attribute, we can see the maximum amount of colors that can be found, which we determined earlier. We can also see that the algorithm detected 5 colors in the image. It will look something like the image below.
Note: The amount of colors found is limited by the maximum colors that you allow. If you want more colors to work with, simply raise the maximum color value.
The algorithm will not generate colors if the the maximum amount of colors is higher than the amount of colors detected by the algorithm.
In the attribute we have already defined a few color options that we can use. They will show up below the image uploader. The colored squares to the left of these options show the original color that is being manipulated. The dropdown menu’s next to it represent the colors that we can change it to.
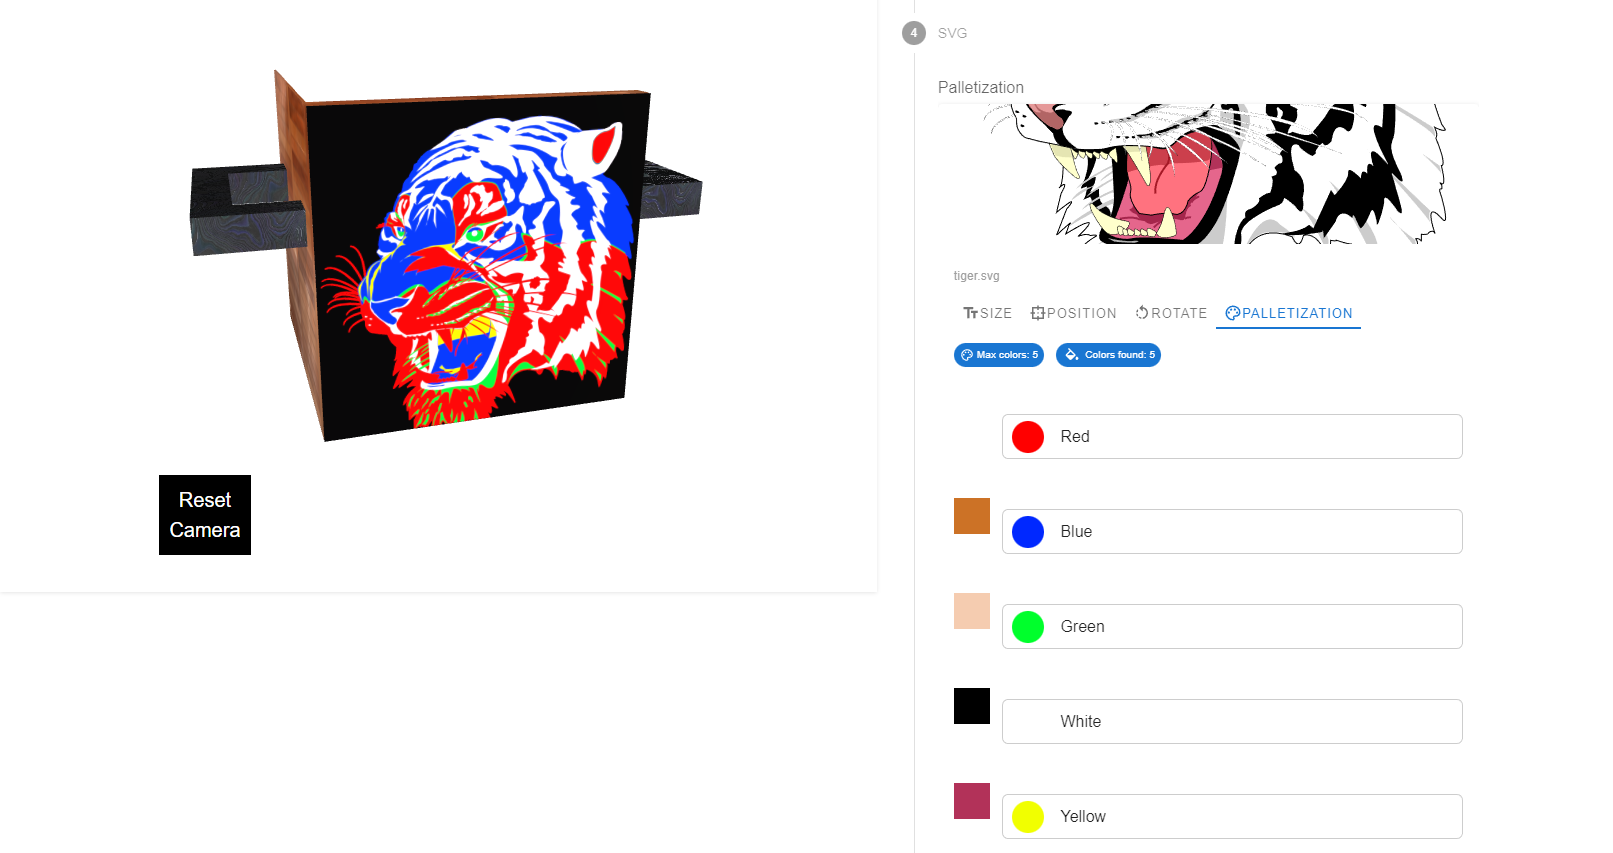
And that’s it! You now have palletization working within your SVG attribute.
Things of note
- Invisible surfaces within your SVG files will be removed (opacity = 0). Surfaces with a slight opacity values will be forced to opacity=1
- The SVG file uploaded should have a proper header, meaning that it should start with <?xml version=”1.0″ encoding=”UTF-8″ standalone=”no”?>
- The algorithm will always combine gradients into 1 color. If you have set a gradient in your SVG file, the algorithm will set the entire gradient to the color of the gradients start point.
- Shadows in your SVG file are not supported and will be removed automatically.
- Blur effects in your SVG file are not supported and will be removed automatically.
- Attributes such as images within your SVG file are not supported at this time and will automatically be removed.