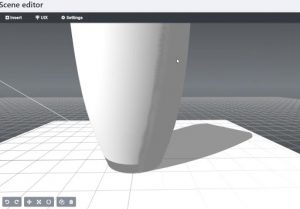
Scene editor
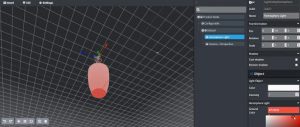
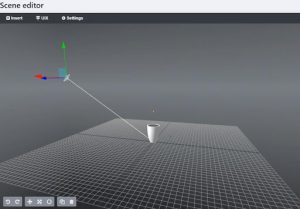
After completing the configuration we can start in the showcase. The showcase is where you can set the product presentation. It’s possible to add lighting, manage the scene and materials and complete the product visuals.
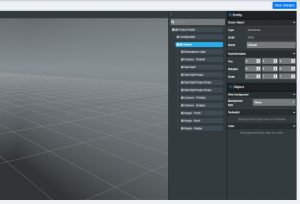
The Layout exists out of 4 parts:
- Insert toolbar (for inserting parts into the scene and settings can be changed)
- Scene hierarchy – including the product node, layers, property panel (properties of selected objects)
- the editing toolbar:
- Redo
- Undo
- Position transformation: allows you to move the selected object around
- Scaling transformation: for scaling selected objects
- Rotation transformation: for rotating selected objects
- Copy: For duplicating an object, into the scene
- Delete button: For deleting an object
- The sidebars can be opened and closed by clicking the arrows
Use the right mouse button to move the screen, the left mouse button to rotate (orbit around the focus point) and the middle mouse button to zoom in and out by scrolling up or down.
Pay attention! It’s important to check the units before adding new items. After opening the scene it’s possible an object isn’t visible. The problem might be an object that is too big or too small. By adjusting the scale or zooming in or out the object will appear again. If the object is drawn in centimetres, this has to be changed to meters, because the scene uses meters (1 centimetre means you have to fill in 0,01). You can change the scale in the Configurable node by typing the correct number, using the arrows or dragging up/down.
The same goes for position and rotation. This can also be done with the tools in the toolbar.
Inserting Camera
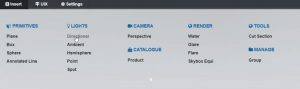
There are 2 important parts in product presentation, adding the right camera and the right lighting. Adding a camera is required, if there’s no camera inserted in the scene, the product will not be visible. So the first thing to insert is a camera. Do this by going to Insert → Camera → Perspective.

The camera is inserted in the scene, select the camera in the layer to adjust. You can choose the view from where the customer gets to look at the product. Move your own view to the desired location of how you want to present your product and select Set Camera (and click confirm) in the camera properties.
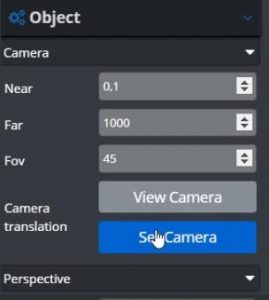
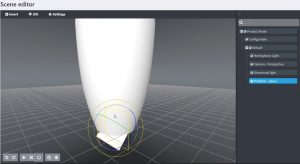
By setting the camera, the viewing point is selected. The camera is always aimed at the focus point, which is also the point where the camera rotates around. Click View Camera to see the focus point. You can change the focus point by clicking the Transform Focus.
![]()
This allows you to drag the focus point to the right spot or fill in the focus point in numbers.
![]()
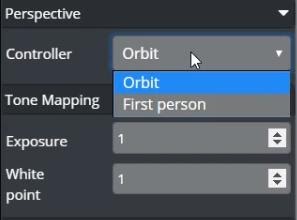
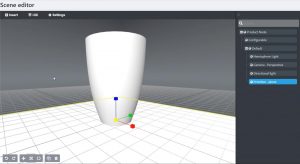
The controllers are very important for using the camera. There are 2 types of controllers, Orbit and First Person. Orbit allows you to rotate around the focus point. First Person means you ‘stand’ in front of the product and can only look up, down or sideways. You can select the controller you want to use at Perspective → Controller.
Choosing the right light source is an important part of presenting your product. At Insert, Lights you can select several light sources:
- Directional: Directional light source, illuminates objects equally, from a given direction. Often used to mimic sunlight.
- Ambient: Ambient/surrounding light source, which is used to create a basic surrounding, offering an easy way to create a realistic effect.
- Hemisphere: This illuminates the whole product equally. One hemisphere light is by default present in your scene at the start.
- Point: Light originates from a single point and spreads outward in all directions.
- Spot: Light originates from a single point and spreads outward in a cone.
Normally, the hemisphere light is already set. This is a light source that lights up the complete product. You can change the colour and its intensity in Light Object. The shadow colour at the bottom, where no light is shining, can be set in Ground Color. You can adjust these colour settings as well.
If you want to use a different light source, you can reduce the intensity of the Light Object. This will mean most light that will be shining on the object is coming from a different light source.
Now you can insert different lighting. Go to Insert and choose the lighting you want, such as directional light. You can edit the lighting by selecting the right light source in the scene or in the sidebar. It’s very easy to drag the point where the light is shining from, to the right spot.
You can easily change the colour and its intensity at Light Object.
Adding a shadow
It is possible to add shading, you can do this by ticking the box for Cast shadow.
![]()
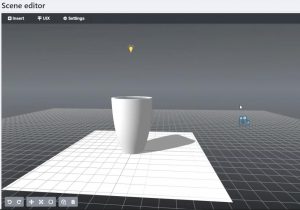
This way a shadow can be cast from the product, but you need a surface for this shadow to fall on. You can add one by going to Insert → Primitives and select Plane. The Plane is added vertically, so select the Plane in the sidebar and use the rotation button in the toolbar to rotate it to a horizontal position.
Use the scaling button to increase the scale of the plane so it covers a significant area beneath the product.
Afterwards, click Receive shadow in the plane’s properties to create the shadow. Click Save changes to save and see the changes you made.
A problem may occur where the shadow is visible on the product itself, like the following example:
You can easily solve this by going back to the directional light and lower the bias.

Note: The primitives are all shapes that can be added.
Change Background
It is possible to change the look of your scene background. You can do this by selecting the Default node. Here you can find your background types underneath Object. By default, the background type is set to None. Other background types to choose from are, Transparent, Color, Image, and Cube.
Selecting Transparent will turn your scene completely transparent and on you will see the background of your website once integrated.
Selecting Color will activate the Color option beneath Background type. Here you can change the background colour to any colour you want.
Selecting Image will activate the Texture[s] option beneath Background type. Here you can add an image from the media library. However, at the moment this will not change anything about your scene.
Selecting Cube will also activate the Texture[s] option, but this time it will give you 6 image inputs. But like with Image, currently these don’t affect the scene.
Once you’re happy with your background, don’t forget to click Save Changes and then you can view the new background in the Preview window.
Edit Materials
It is possible to edit the materials assigned to your object straight from the showcase editor. You can do this by selecting the material you want to edit in the scene. The configurable node opens and all properties are visible.
Pay attention! If you made any changes in this section, it’s very important you click Save Changes at the bottom of the sidebar. If you don’t do this, all the changes you made will be reverted.
You can find an extensive explanation of the materials in the materials section of the documentation.
Product node
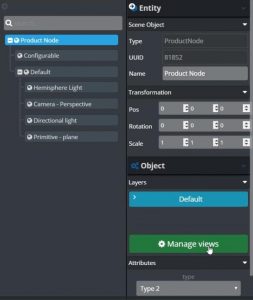
All configurable attributes of your product are visible, and useable, under Product Node. By changing the configuration of your product here you have access to all different materials and setups of your product without ever having to leave the showcase editor.
It’s also possible to choose different light setups in multiple layers of a product. Let’s say you are selling a house and you want to use a different kind of lighting for the outside of the house than for the inside of the house. To do this you click on Manage views underneath Layers.
Now you can add a new View by filling in a name at the field for New view name, click Add view and click Save changes.
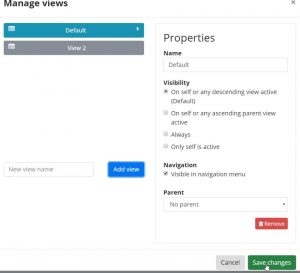
Now you can switch between views by clicking the view name. All set details in the first view will not be visible in the second view and vice versa, everything can now be set individually. In Rules, you can set up when the first view is used and when the second view is used. For a detailed explanation of how to use the rule system go to the section on Rules.
After making changes, click Save Changes. If you then go to Preview in the top bar you get the see the product the same way the customers will.