This page will show you how to add textures and materials, and assign them to your model.
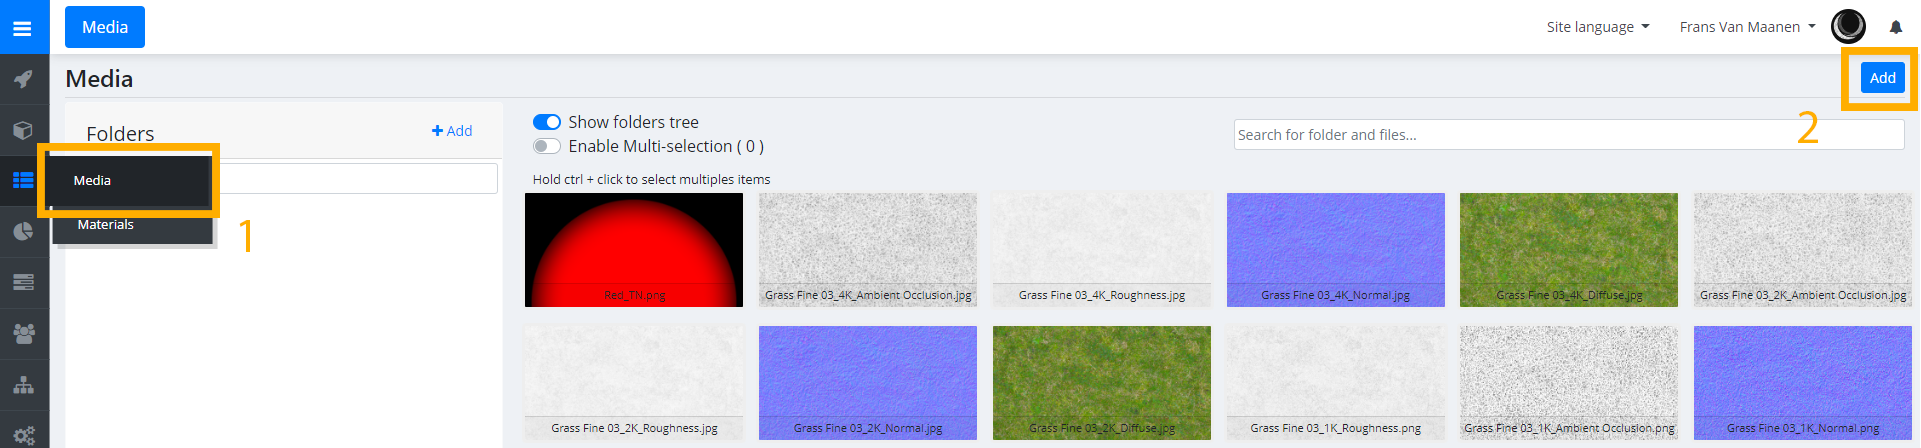
First we will add the textures that we want to use inside our materials to Expivi. To add textures, navigate to the Media (1) tab. Her you can see all the textures that have been added to your account. These textures are shared among all products. To add a new texture click Add (2) at the top right of the screen.
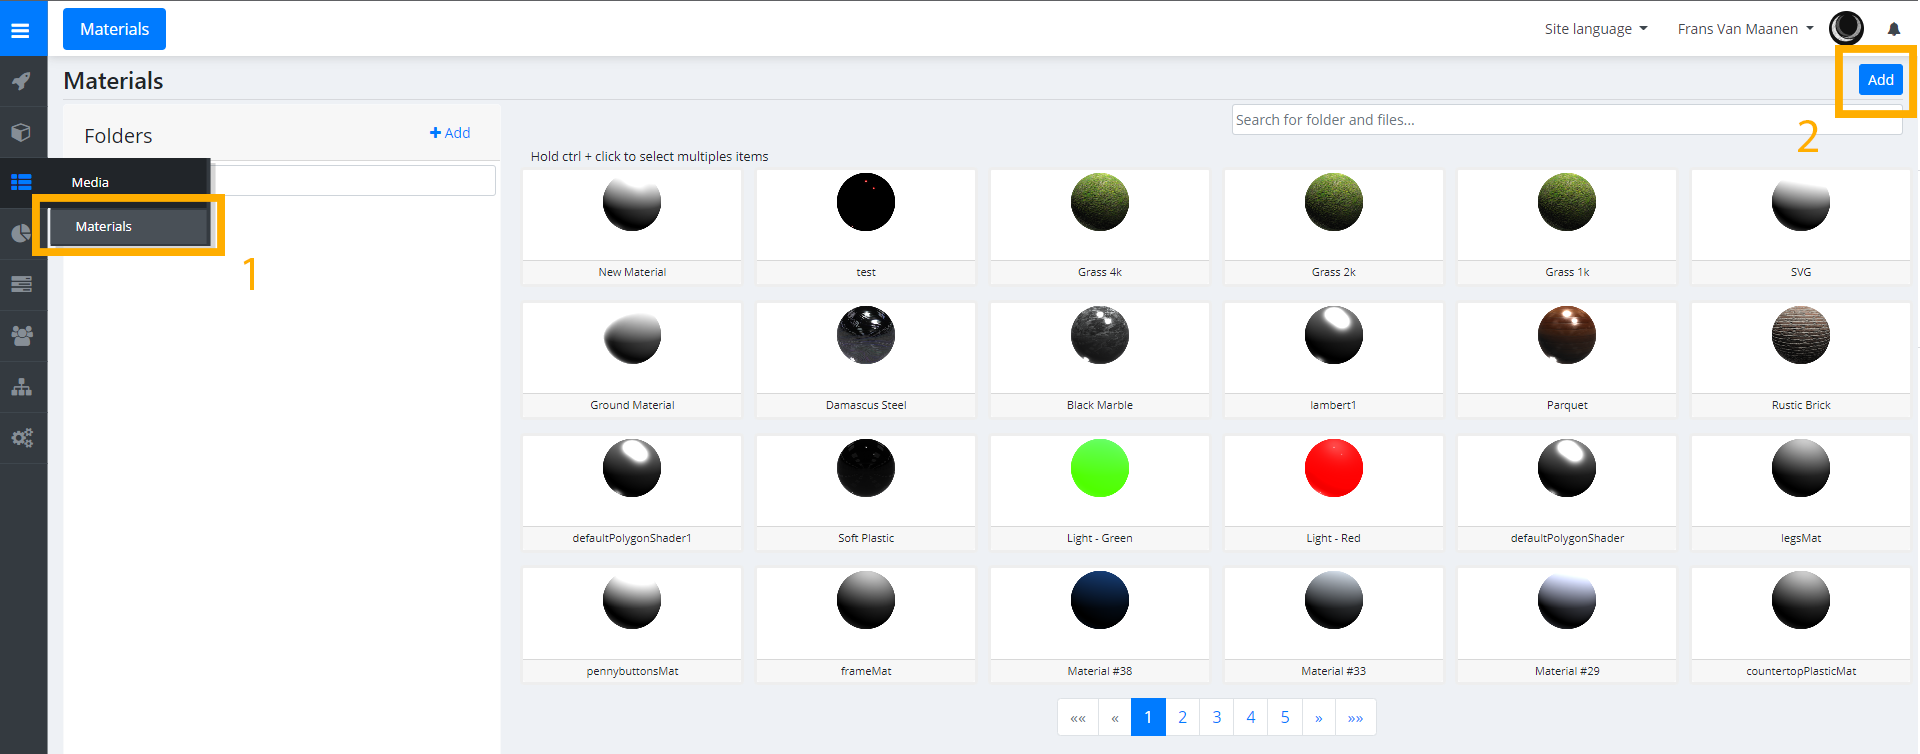
Now that we have our textures inside Expivi, it is time to create a material to attach these textures to. To add a material, navigate again to the media tab and select Materials (1). Now we can see a list of all the materials we have added to our project. To add a new material click the Add (2) button on the top right.
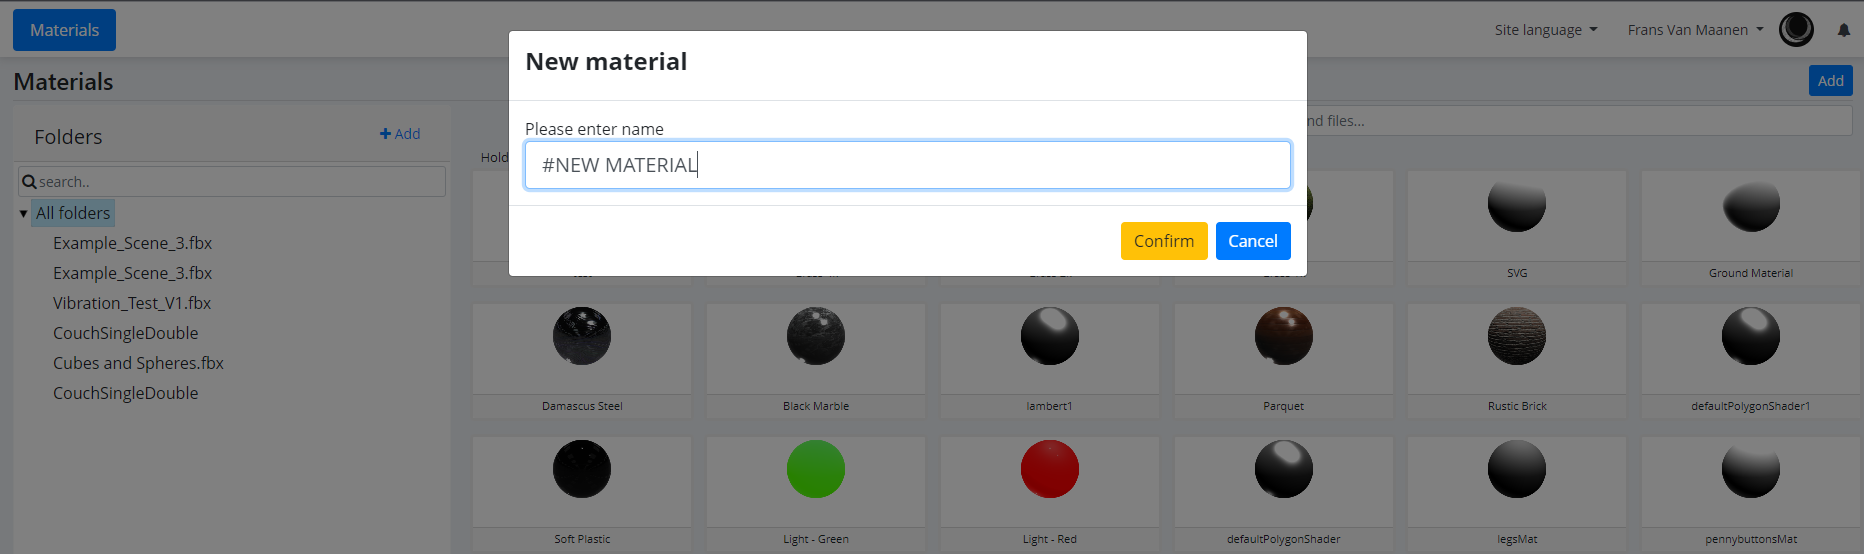
You will be prompted to name the material. You can name this whatever you want. Click Confirm when you are done to create the material.
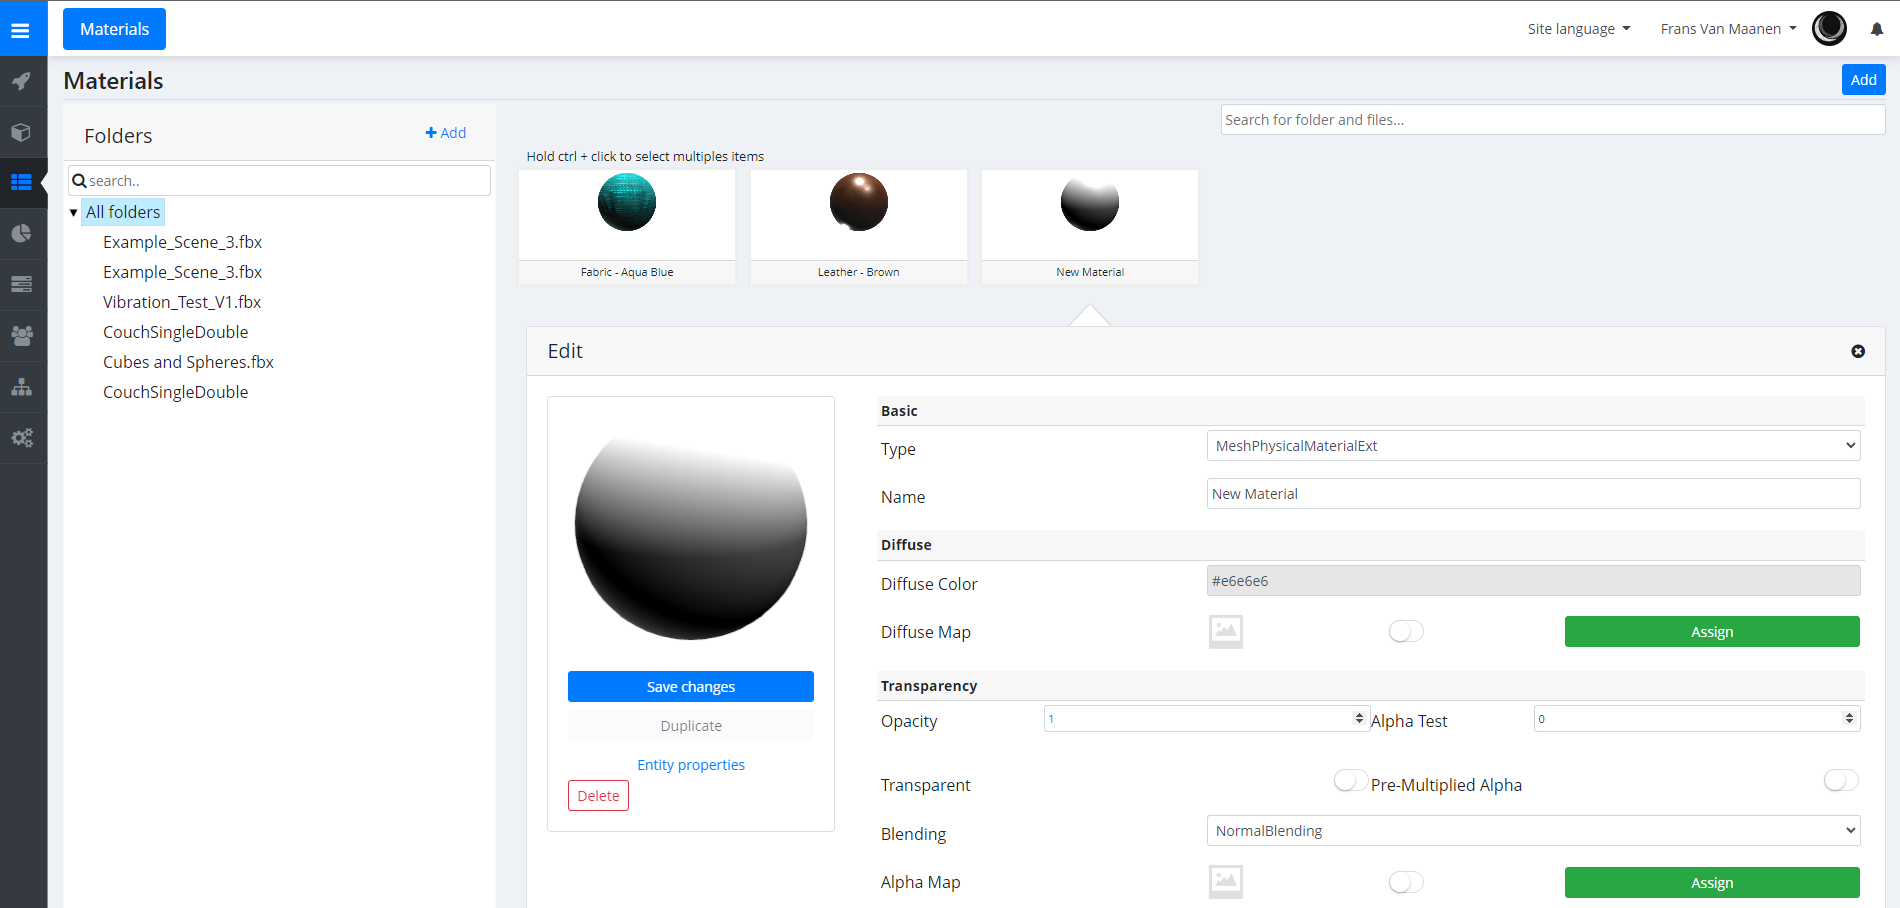
Our new material has now been created! To edit the material, find it in the list and click it to open the options. In the options we can adjust the material to our liking. Here is also where we can add the textures that we uploaded earlier to our material. You can for instance enable the Diffuse Map option and Assign one of the textures here. Configure your material until you are satisfied with it.
We recommend using the material type: MeshPhysicalMaterialExt for the best results.
Now that we have finished our material, it is time to add it to our model. We do this by assigning our new material to a material group. Material groups are automatically created by using the mat_name_e extension in our hierarchy. To see how to set that up please check the Attributes article.
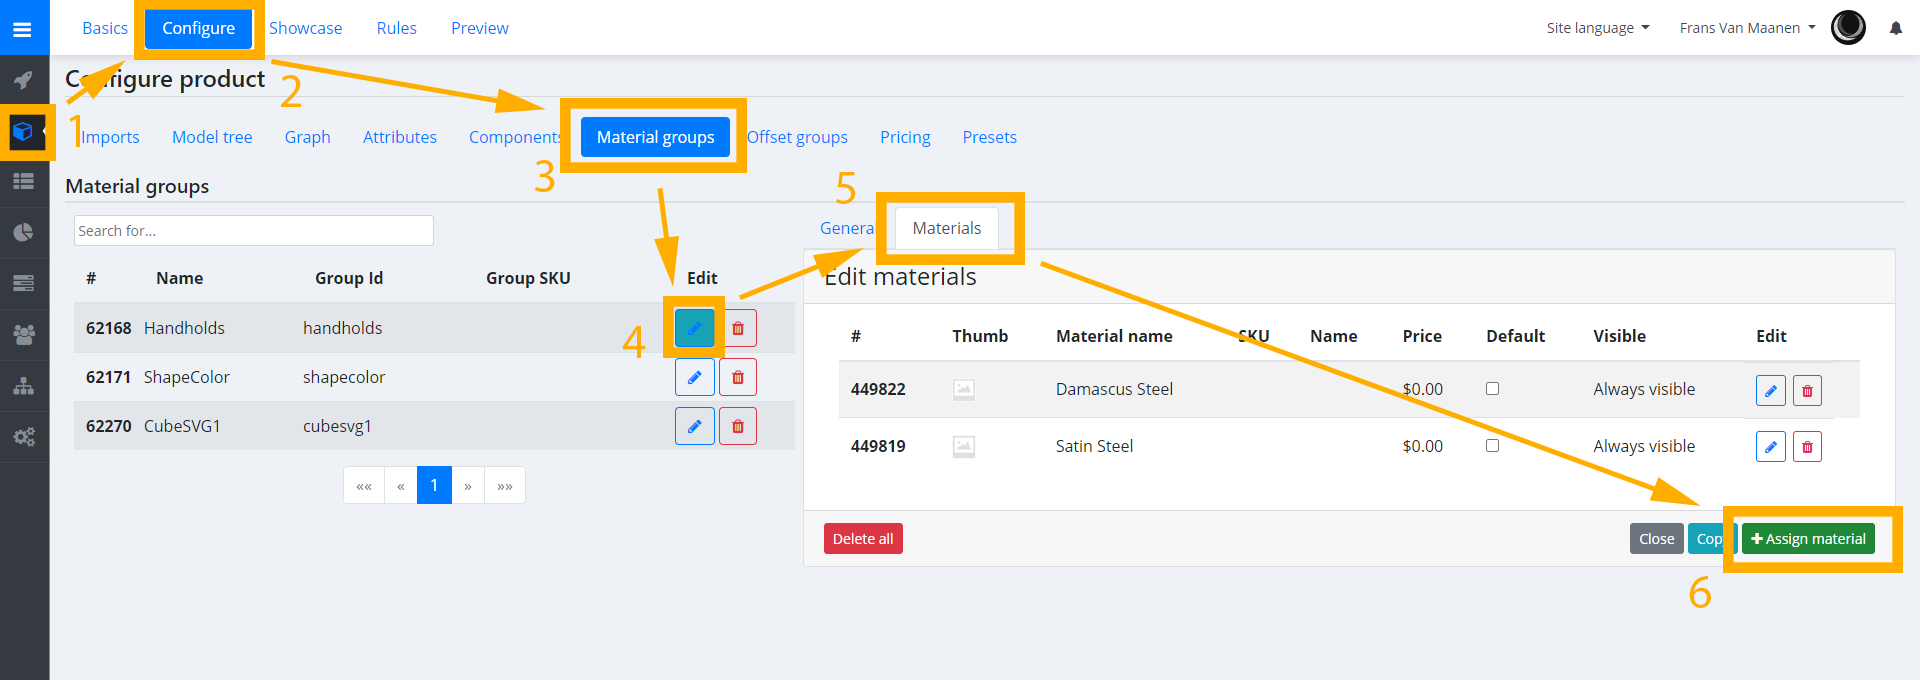
To add a material to a material group, navigate to Catalogue (1) → Configure (2) → Material groups (3) → Edit material group (4) → Select Materials (5) → Click on +Assign material (6).
You can add multiple materials to a material group. These will become visible in the configurator if you link the material group to a matgroup attribute under attributes. To learn more about attributes, please visit Setting up your Attributes