Table of Contents
How to integrate the Expivi 3D configurator with Magento
Before installing the extension, you need to manually create an account on Expivi’s platform: Expivi.net. Each subscription plan comes with a free 30-day trial. You may go for the free plan or upgrade your account to a paid plan. Once installed you will need to configure the extension since credentials are required for the Expivi platform. The credentials can be found in the Expivi web dashboard.
Integration
Plugin acquisition
Purchase the plugin at the Magento Marketplace. This plugin is offered for free, do make sure that you choose the correct Magento version.
Plugin installation
There are two ways of installing the plugin.
- Composer installation (server shell access required)
- Magento Web Setup (easiest)
There is no FTP upload possibility for this plugin.
1. Composer installation
- Open the shell on the server and execute the following commands in the root of the magento installation
composer require expivi/magento-viewer
- Enter your access keys if needed, you can find them here.
- After this process is complete, the plugin has been installed
2. Magento Web Setup
After purchasing the plugin, you can find the plugin in the Web Setup Wizard under Component Manager.
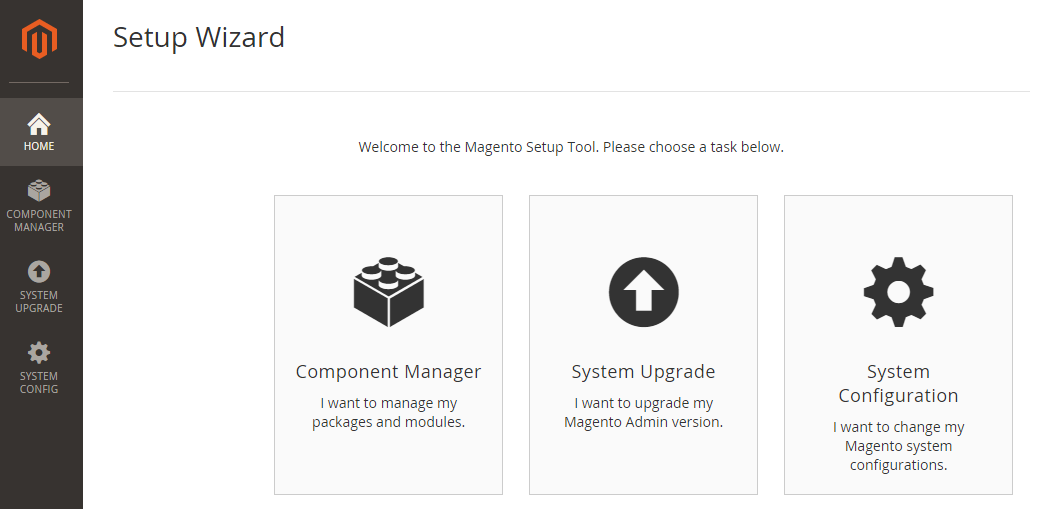
No screenshot of installation panel with Expivi plugin, due to server issues
Configuration
Upon first installation there are a few configuration values that need to be entered. You can find the configuration page for the Expivi Magento Viewer in Stores > Configuration.

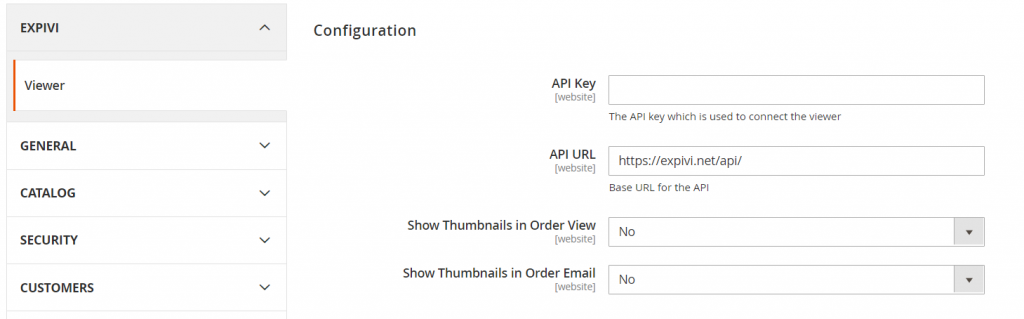
The API Key can be generated in the Expivi Administration panel. Make sure that the API Key is generated with the Viewer Token role.
Warning: the access token will only be shown once and cannot be retrieved again. You’ll have to create a new access token if you need one.
Show Thumbnails in Order View: Enabling this will enable the thumbnails generated from the configurator to be shown in the orders visible in the customer profile.
Show Thumbnails in Order Email: Enabling this will enable the thumbnails generated from the configurator to be shown in emails sent to the customer.
If an incorrect API Key is entered, the following message will show in the notification area;

Products
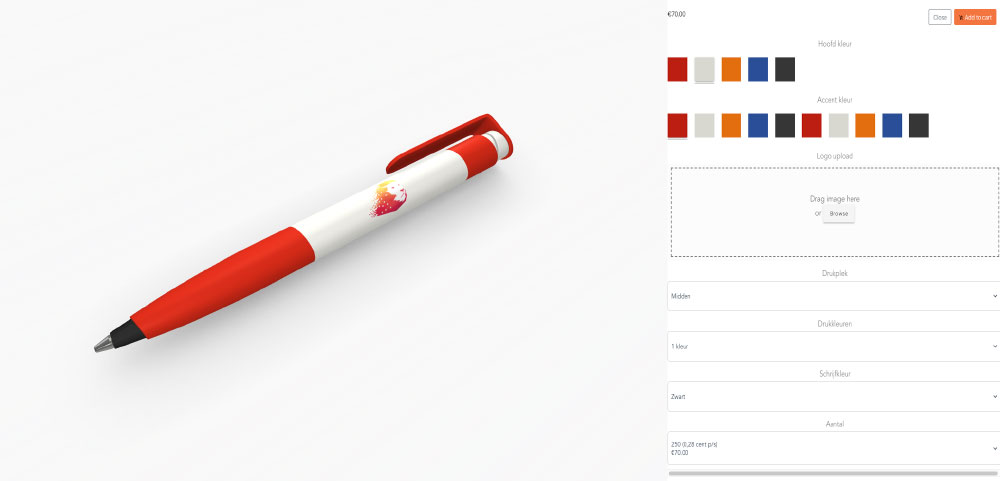
The Expivi Magento Viewer currently only supports the Simple product type. When you have created a Simple Product, you can connect it to the Expivi product (found in the Expivi Administration panel) by entering the ID of the product in this field;

This will show the product with the configurator on the storefront, and allow the product to be configured with product options configured in the Expivi Administration panel.
It is not possible to save or create a product in Magento if the API Key is not correct.
Additional features
Using custom fonts
NOTE: custom fonts are only supported from Expivi version 1.6.1 and onwards.
When using the text_to_image attribute to show text in the product configuration, you may wish to have customers choose from custom fonts.
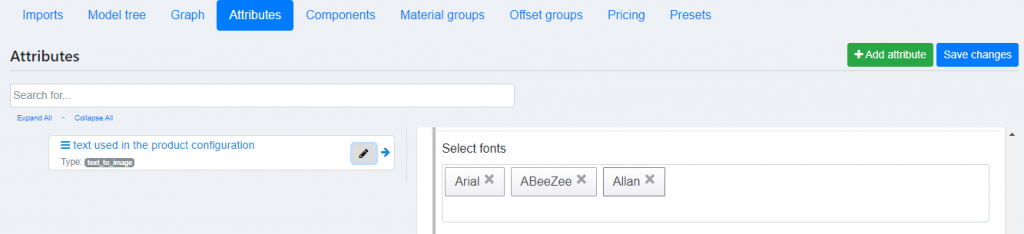
To be able to use these fonts in your Magento storefront, you will have to make some changes in the Magento theme. As seen in the image above we added two custom fonts in addition to the standard Arial font. To load these fonts in the Magento storefront, the google provided CSS has to be added.
Showing how to add css goes beyond this documentation.
Image upload
You can allow customers to upload an image (for example a custom print on a shirt). To enable this you have to use the image_upload attribute in the CMS configuration.
After a product is ordered, you will be able to see url to the uploaded images in the Magento Order page.