Table of Contents
1. Why was the Expivi Script Engine created?
The Expivi Script Engine is an engine that opens endless possibilities to calculate numerous aspects when using the Expivi platform. The idea to create the script engine arose from the need for more flexibility. Primarily calculating what SKU’s were required for assembly of the configured 3D product by a client, another usage for the script engine is calculating the pricing of a 3D configured product.
2. When can the script engine be used?
For the first version of the script engine, we have implemented the following possibilities:
- Determine SKU’s required for a configured 3D product
- Calculate pricing of a configured 3D product
2.1 Determining SKU’s
When dealing with configured 3D products, you will likely be involved with multiple parts required to assemble the finished product. These parts can all have separate SKU’s. With the script engine, you can program a script that will determine the quantity and SKU you need for the finished product. For your scripting purposes, you have a lot of useful data. The following information is available:
- Selected attributes
- Global variables
- Externally sourced data (e.g., an excel spreadsheet)
2.2 Calculating pricing
The script engine also allows for a calculation of pricing. You can program a script that calculates the pricing of the configured 3D product. For your scripting purposes, you have a lot of useful data. The following information is available:
- Selected attributes
- Global variables
- Externally sourced data (e.g., an excel spreadsheet)
3 How can the script engine be implemented?
As mentioned previously, the script engine can determine the SKUs and pricing of configured 3D products. You can use the script engine in various combinations. The following combinations are currently available:
- Script Engine SKU determination + Script Engine Pricing calculation
- Script Engine SKU determination + Pricing Matrix Pricing Calculation
3.1 Script Engine
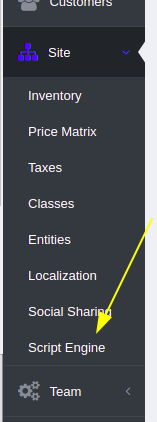
To manage the script engine, there is a navigation option which brings you to the management of scripts and more.
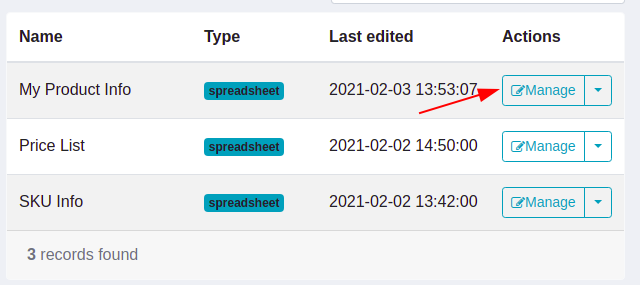
You are presented with the screen below.
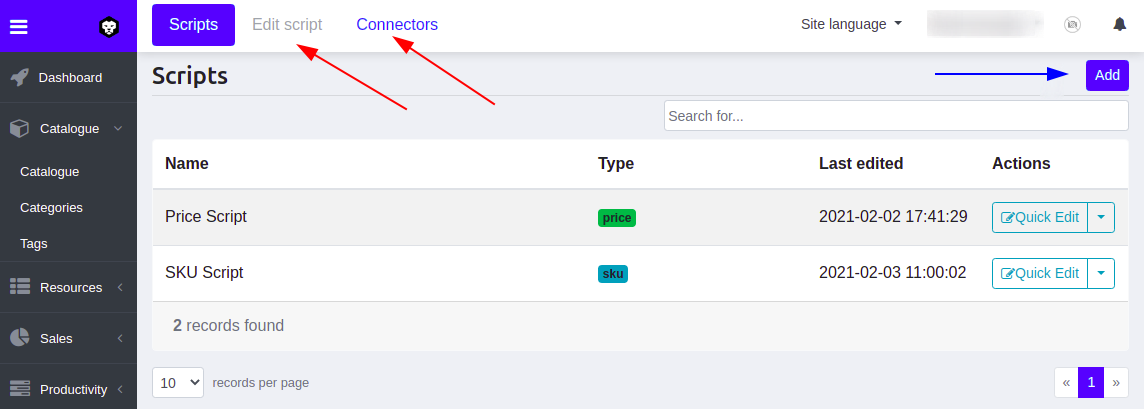
The blue arrow shows where you add another script; the red arrows show where you edit a script as well as add connectors for your script (.e.g. spreadsheet).
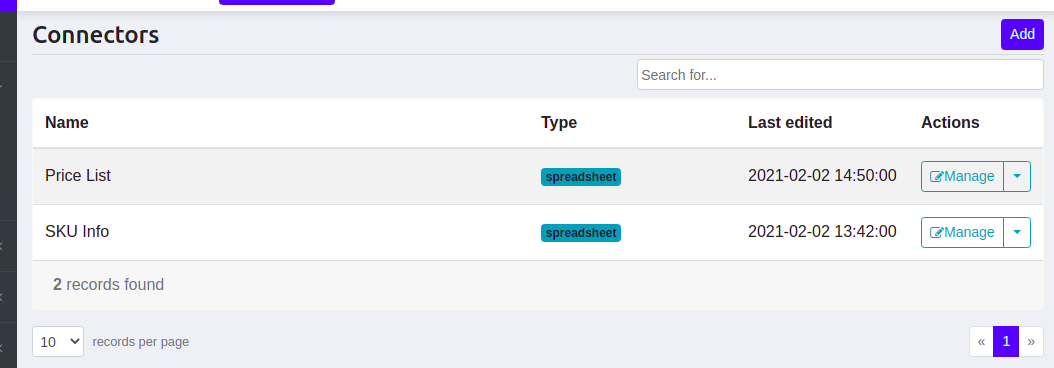
In the above screenshot, you can see an example of two connectors, which are both spreadsheets. A script can now make use of these connectors which provides a script with additional information which is required to make any calculation with the script engine.
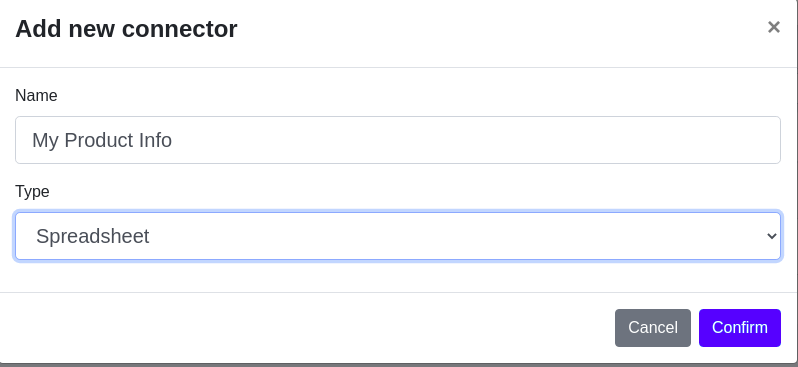
3.1.1 Adding connectors
Provide your connector with a name.
Click on Manage
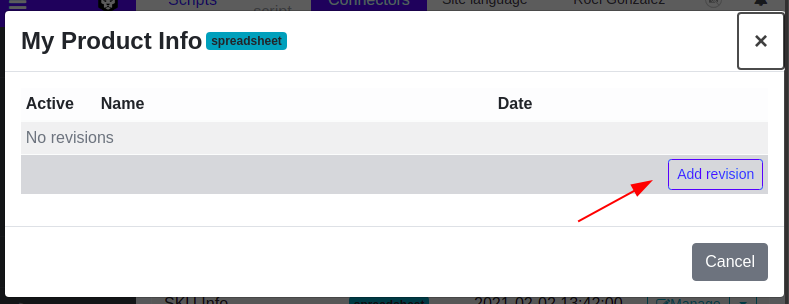
You’ll be presented with a revision screen for your source file (e.g. excel spreadsheet). Click on Add revision.
Upload your document
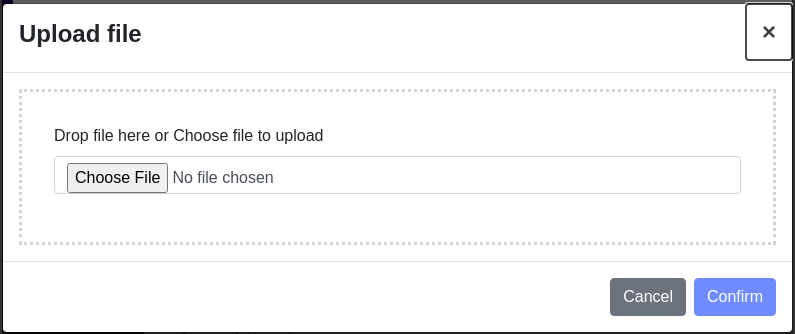
Confirm your document is the correct active data source for you.

3.1.2 Writing a script
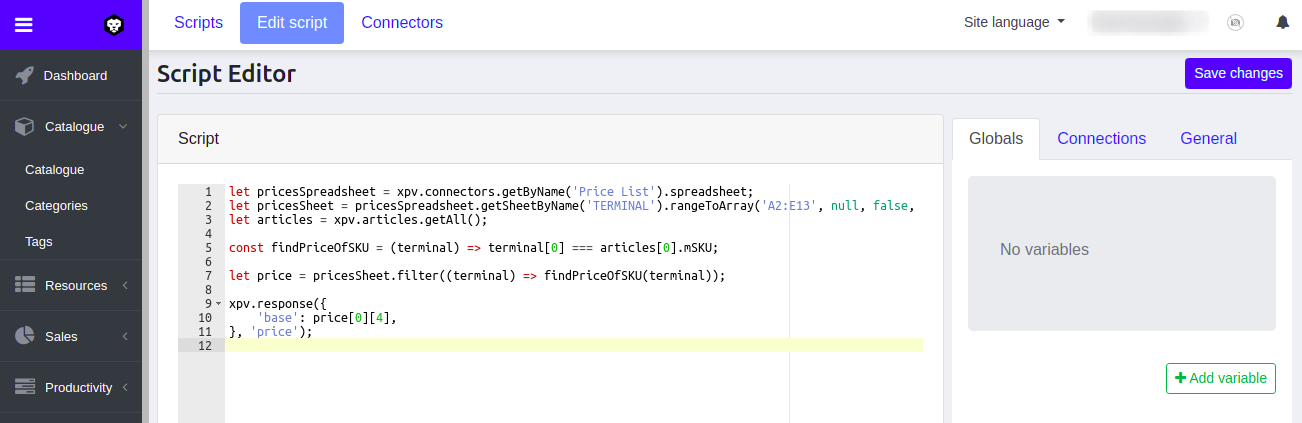
An editor is available for you to write your scripting in. In the screenshot above you can see an example of such script which in this case is for price calculation. See below in the documentation for more detailed instructions about the possibilities you have when scripting.
3.1.3 Using Globals
You can also define commonly used and/or difficult to remember magic numbers/values as global variables, which can then be used in your script with a more memorable name. For example if you have glass terminals that should always refer to the number 42. You can define that in the global variables. More information about globals is given in the Scripting section further below in the documentation.
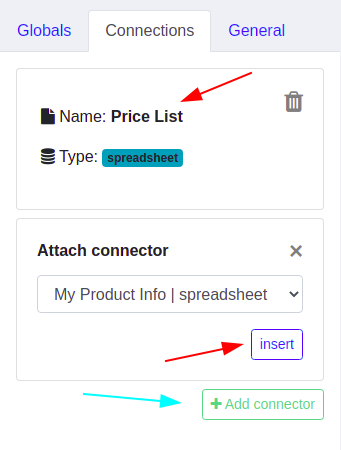
3.1.4 Adding Connectors
To use external data sources in your script (e.g. spreadsheet). You click on Add connector (cyan arrow) and there you select in the dropdown which data source you want to insert for use within the script. In the screenshot below you can see that the connector ‘Price List’ is an already available connector for our script.
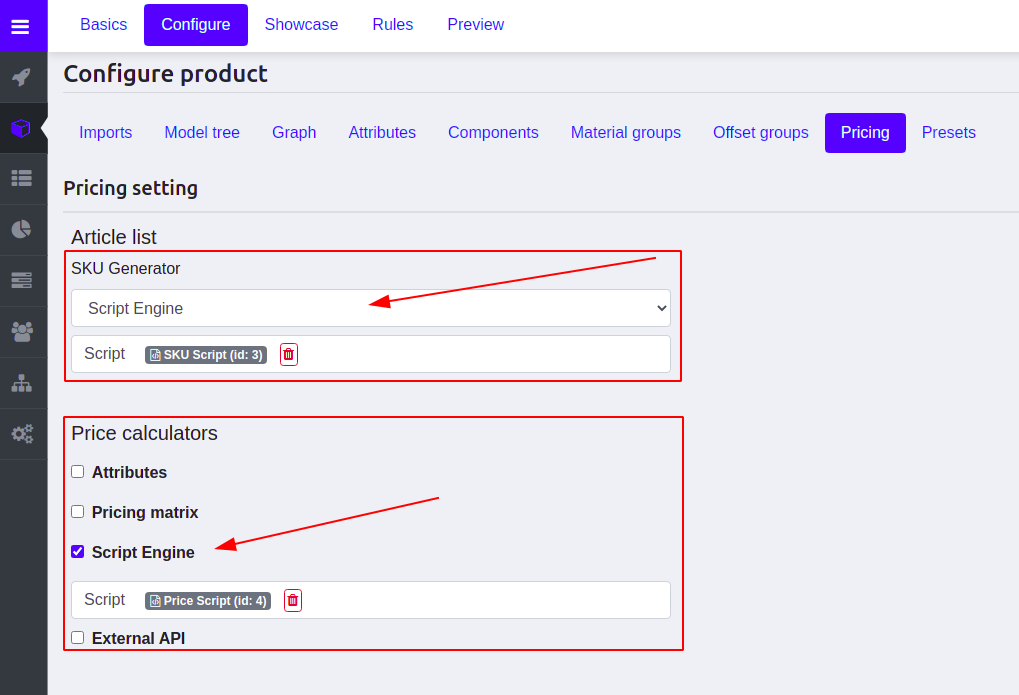
3.2 Pricing Settings
When you select a product from within your catalogue and open the Configure tab followed by the Pricing sub-tab, you see the options for determining SKU and also the Price calculator. Here you can now select script engine. (see screenshot)
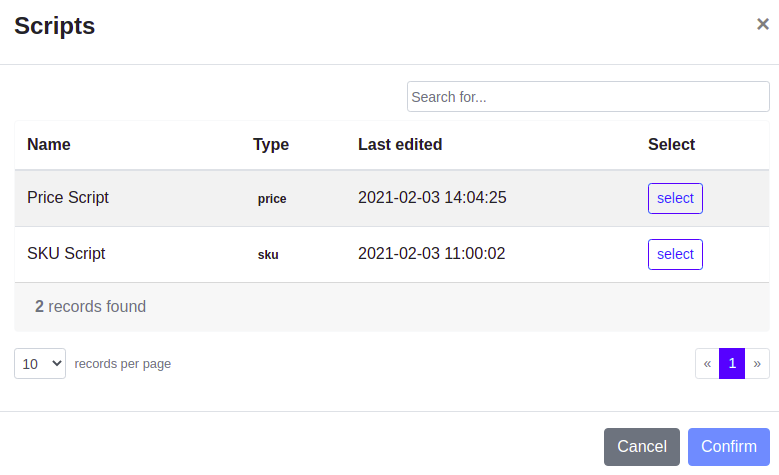
Before you are able to actually make use of the script engine you will need to create a script that the script engine can use for the SKU determination or price calculation. When a script is created you have to connect that script to the pricing setting of the catalogue item. This is done by clicking on connect => select the correct script => confirm (see screenshots)

3.3 Example Product using Script Engine
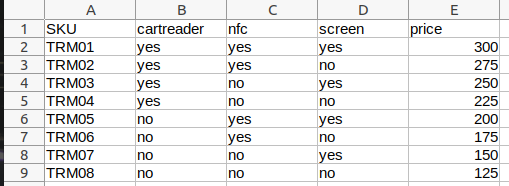

Given the provided spreadsheet added as a connector to the script engine and imagine that the script engine only does a simple truth table calculation (many more complex calculations can be done with the script engine of course!), you see that the result on the configurator is correctly showing a price of $150.
3.4 Scripting
The JavaScript scripting language is used. This means that you can use all of this language’s abilities. The script can additionally also make use of more functionality which is provided through the xpv object. See below for more information about this.
3.4.1 The xpv object
The xpv object is available while you are scripting. All the provided data can be accessed using this object. Check the bottom of this file for the full API specification
3.4.2 Attributes
To access attributes, you can do the following.
const attributes = xpv.attributes.getAll();
// =>
[
  {
    "attribute_id": 123,
    "attribute_name": "Color",
    "attribute_key": "Color",
    "attribute_value": {
        "attribute_value_id": 10010
    },
    "attribute_value_name": "Red",
    "attribute_value_key": "Red"
  }
]

const colorAttribute = xpv.attributes.getByName('Color');
const colorAttribute = xpv.attributes.getByKey('Color');
const colorAttribute = xpv.attributes.getById(123);
// =>
{
  "attribute_id": 123,
  "attribute_name": "Color",
    "attribute_key": "Color",
  "attribute_value": {
      "attribute_value_id": 10010
  },
  "attribute_value_name": "Red",
    "attribute_value_key": "Red"
}
3.4.3 Globals
To access globals, you can do the following.
const allGlobals = xpv.globals.getAll();
// =>
[
  {
      "value":"DRWRS",
      "name":"Drawer"
  },
  {
      "value": 67,
      "name": "columnColor"
  }
]

const colorColumn = xpv.globals.getByName('columnColor');
// =>
{
    "value": 67,
    "name": "columnColor"
}
3.4.4 Connectors
To access connectors (external data source e.g. excel spreadsheet), you can do the following.
const availableConnectors = xpv.connectors.getAll();
// =>
[
  {
      "name":"SKU Sheet",
      "type":"spreadsheet",
      "path":"path/to/file.xlsx"
  }
]

const SKUS = xpv.connectors.getByName('SKU Sheet');
// =>
{
    "name":"SKU Sheet",
    "type":"spreadsheet",
    "path":"path/to/file.xlsx"
}
Important: when you execute the getByName(…) method, you are provided with an instance of PhpOffice\PhpSpreadsheet\Spreadsheet : https://phpoffice.github.io/PhpSpreadsheet/classes/PhpOffice-PhpSpreadsheet-Spreadsheet.html
For documentation on the usage of PHP Spreadsheet, follow this link to the official documentation.
https://phpspreadsheet.readthedocs.io/en/latest/
3.4.5 The response of a script
Your script must return a value that complies with the standard format.
SKU Format
The scriptResult must be an array of objects format.
const scriptResult = [
  {
    'quantity': 1,
    'sku': 'PO-TS-32-YL'
  },
  {
    'quantity': 5,
    'sku': 'PO-TS-34-BK',
    'name': 'Polo T-Shirt'
    'description': 'Polo T-Shirt, Size 34, Color Black'
    'price': 19.99,
  }
];
The object contains the following properties:
- quantity: number
- sku: string
- name: string (optional)
- description: string (optional)
- price: float (optional)
Pricing Format
The scriptResult must be in the format of an object.
const priceScriptResult = {
  'base': 34.65,
};
The object contains the following properties:
- base: string
You may add more fields to the object if needed.
Returning Data
To return data from your script place the variable containing the data on the last line of the script.
priceScriptResult;
Example Script
The below example is for SKU determination, however, the concept is the same for price calculation. Keep in mind that you pass the correct ‘price’ argument for the second parameter of the xpv.response(…) method when making a script for price.
//
// Grab spreadsheet adapter from connector(s)
//
const spreadsheet = xpv.connectors.getByName('SKU Connector').spreadsheet;

//
// Attributes
//
const color = xpv.attributes.getByName('Color').attribute_value_name;
const size = xpv.attributes.getByName('Size').attribute_value_name;

//
// Shirt Sheet
//
const shirtSheet = spreadsheet.getSheetByName('TSHRTS').rangeToArray('A1:D25');

//
// Script Rules
//
const colorFilter = (shirt) => {
  return shirt[1] == color;
}

const sizeFilter = (shirt) => {
  return shirt[2] == size && size != 'XS';
}

const sku = shirtSheet
  .filter((shirt) => colorFilter(shirt))
  .filter((shirt) => sizeFilter(shirt));

const result = [
  {
    "quantity": 1,
    "sku": sku[0][0]
  }
];

result;
API Specification
The xpv object.
{
attributes: {
    getById(number): Attribute,
    getByName(string): Attribute,
    getByKey(string): Attribute,
    getAll(): Array<Attribute>
  },
  articles: {
    getById(number): Article,
    getByName(string): Article,
    getBySKU(string): Article,
    getAll(): Array<Article>
  },
  connectors: {
    getByName(string): Connector,
    getAll(): Array<Connector>
  },
  globals: {
    getByName(string): Global,
    getAll(): Array<Global>
  },
  user_data: {
    getAll(): Array<any>|string
  }
}
Models
type Attribute = {
  attribute_id: number,
  attribute_name: string,
  attribute_value: {
    attribute_value_id: number,
  },
  attribute_value_name: string,
  attribute_value_key: string,
  attribute_key: string
};

type Article = {
  mModelId: number,
  mSKU: number,
  mName: string
};

type Connector = {
    name: string,
    type: string,
    path: string
};

type Global = {
  value: string,
  name: string
};
Script Type Return Data Formats
//
// Price scripts
//
type PriceScript = {
  base: number
};

# example
const price = { base: 123 };

//
// SKU Scripts
//
type SKUScript = {
  quantity: number,
  sku: string,
  name?: string,
  description?: string,
  price?: number
}[];

# example
const skus = [
  {
    quantity: 1,
    sku: "123"
  }
];

//
// Arbitrary scripts
//
type ArbitraryScript = {
  data: any
};

# example
const data = { data: "test" };